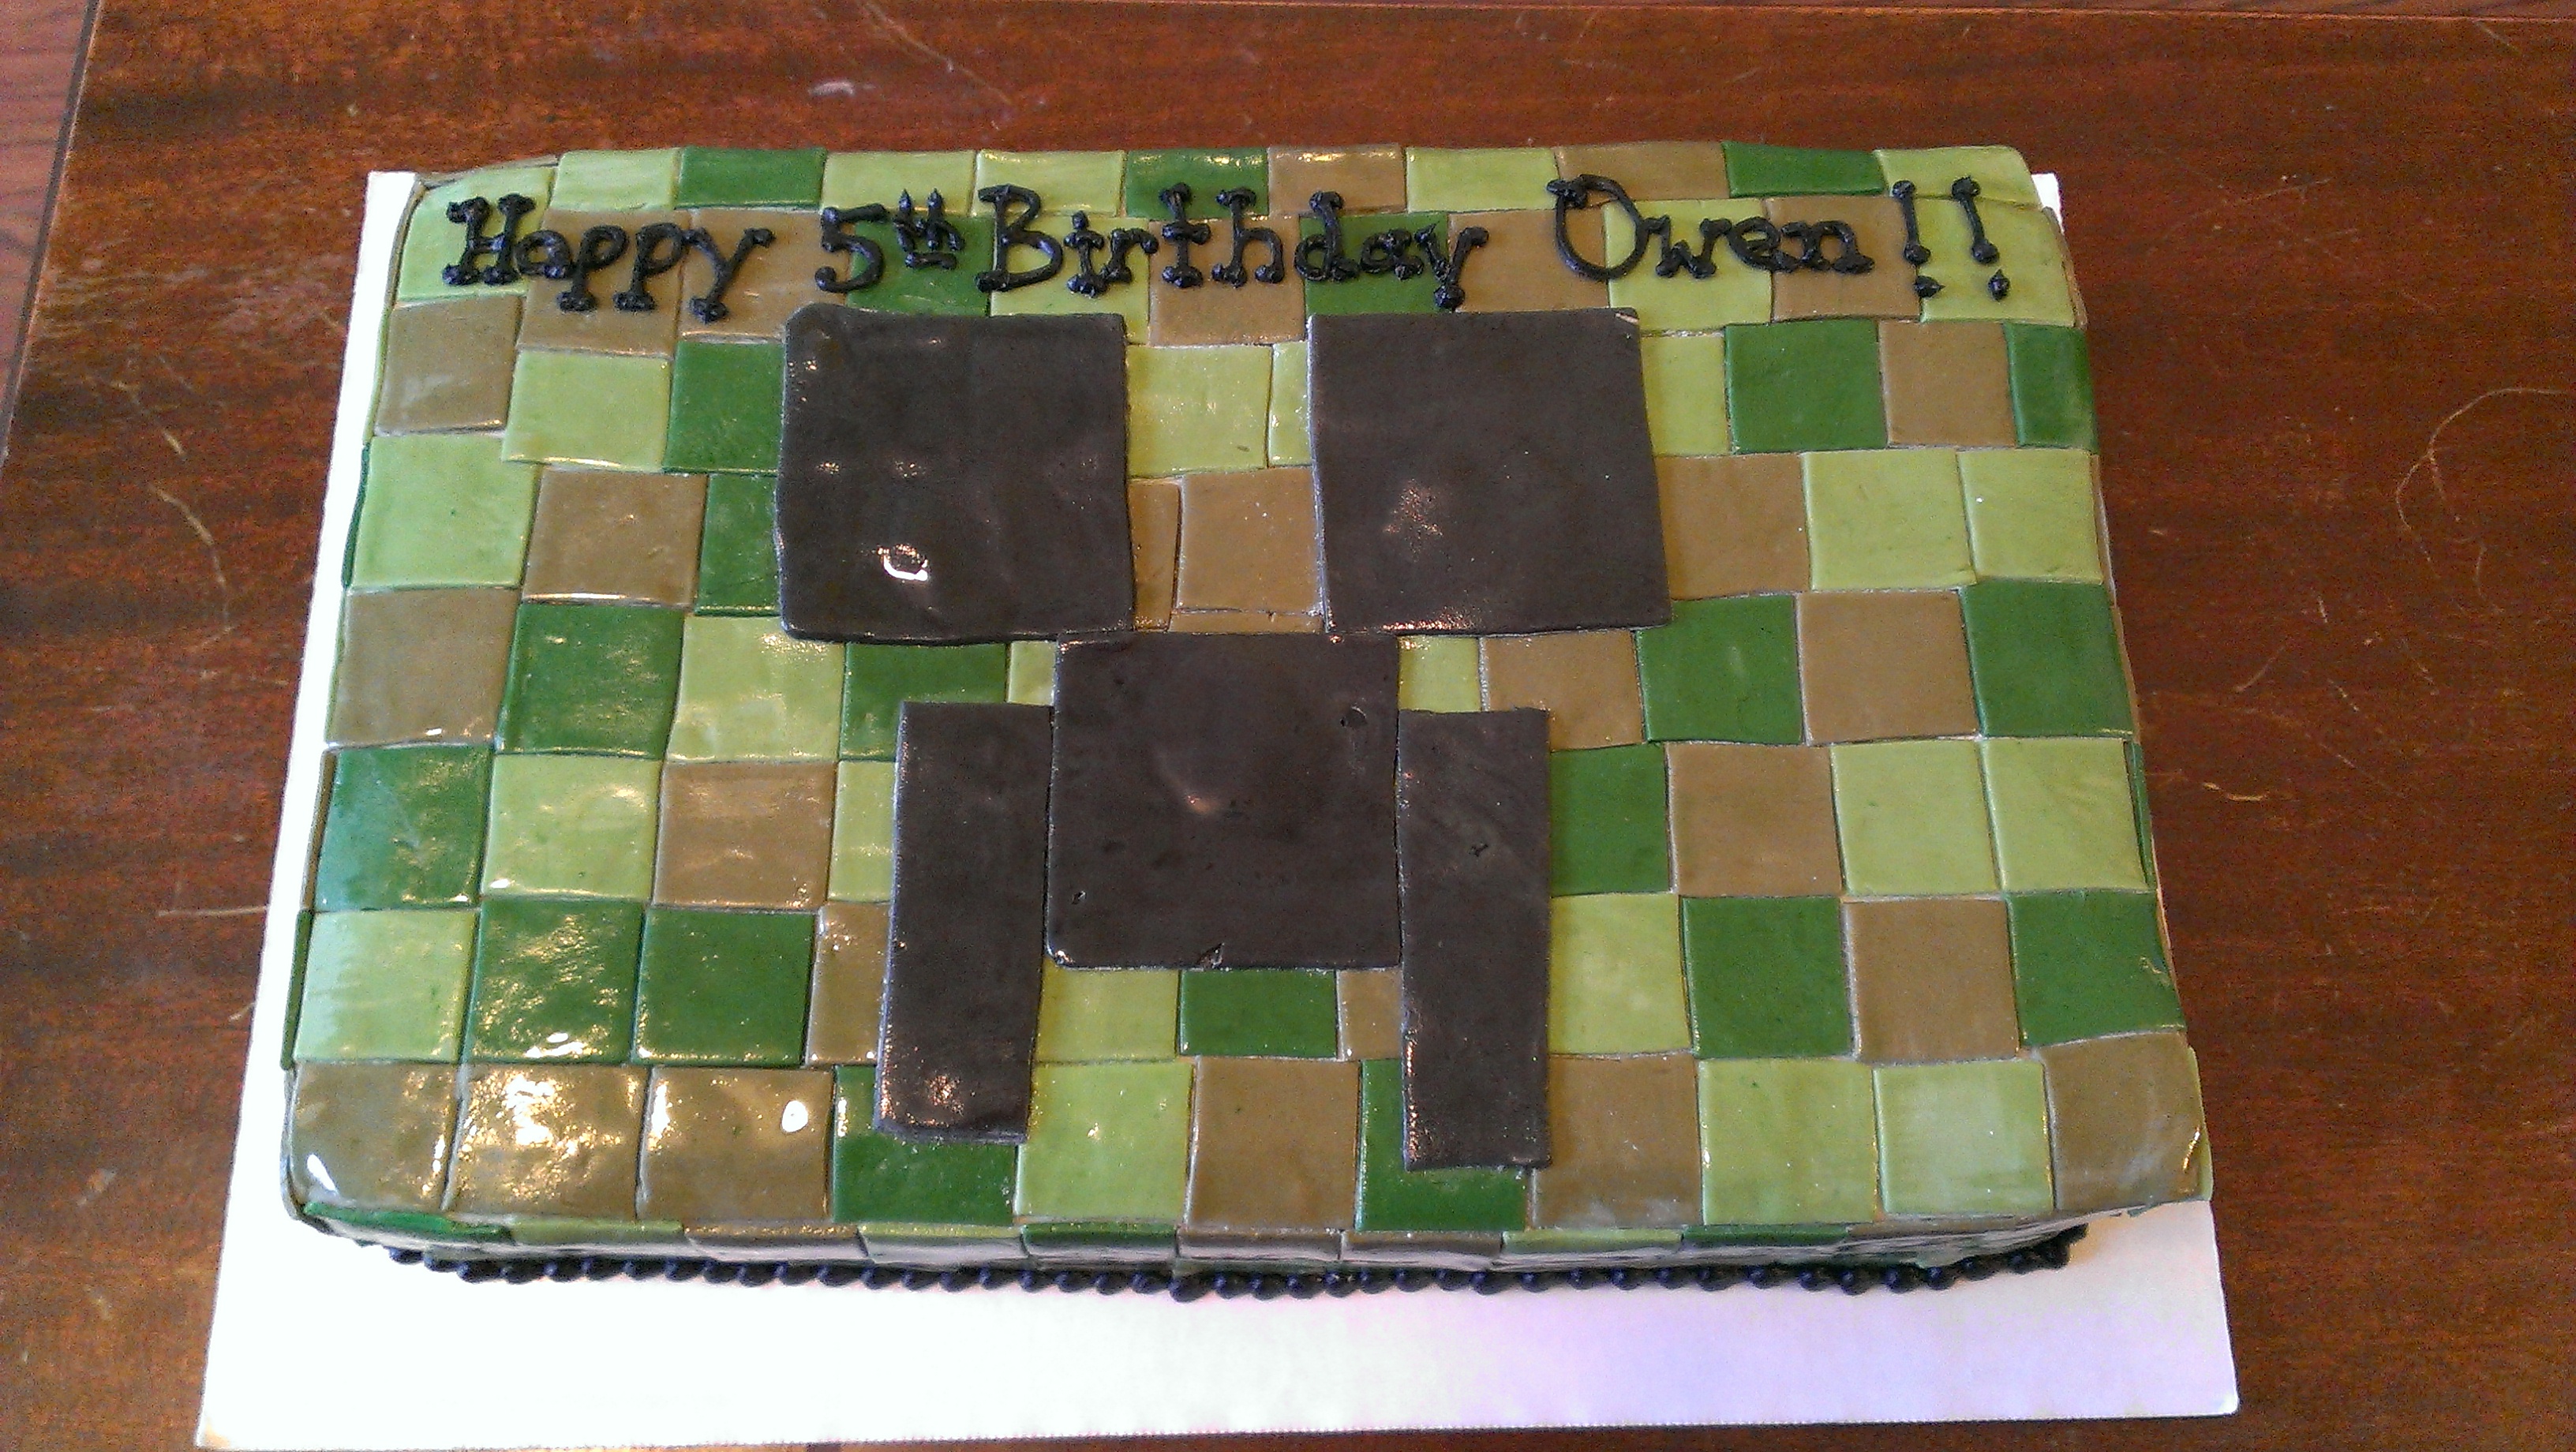
This cake was for a Minecraft loving little guy. The camouflage and “Creeper” are fondant.
This cake was cute and fun, but it also was sentimental for the family. This design was based on the birthday boys’ favorite book “The Little Blue Truck”. When the mom picked it up, she explained that the book was given to her oldest son by her father in law, who had since passed on. So of course, that gave a whole new meaning to what that book will mean to her boys. I teared up when she told me! Have I mentioned I love my job?
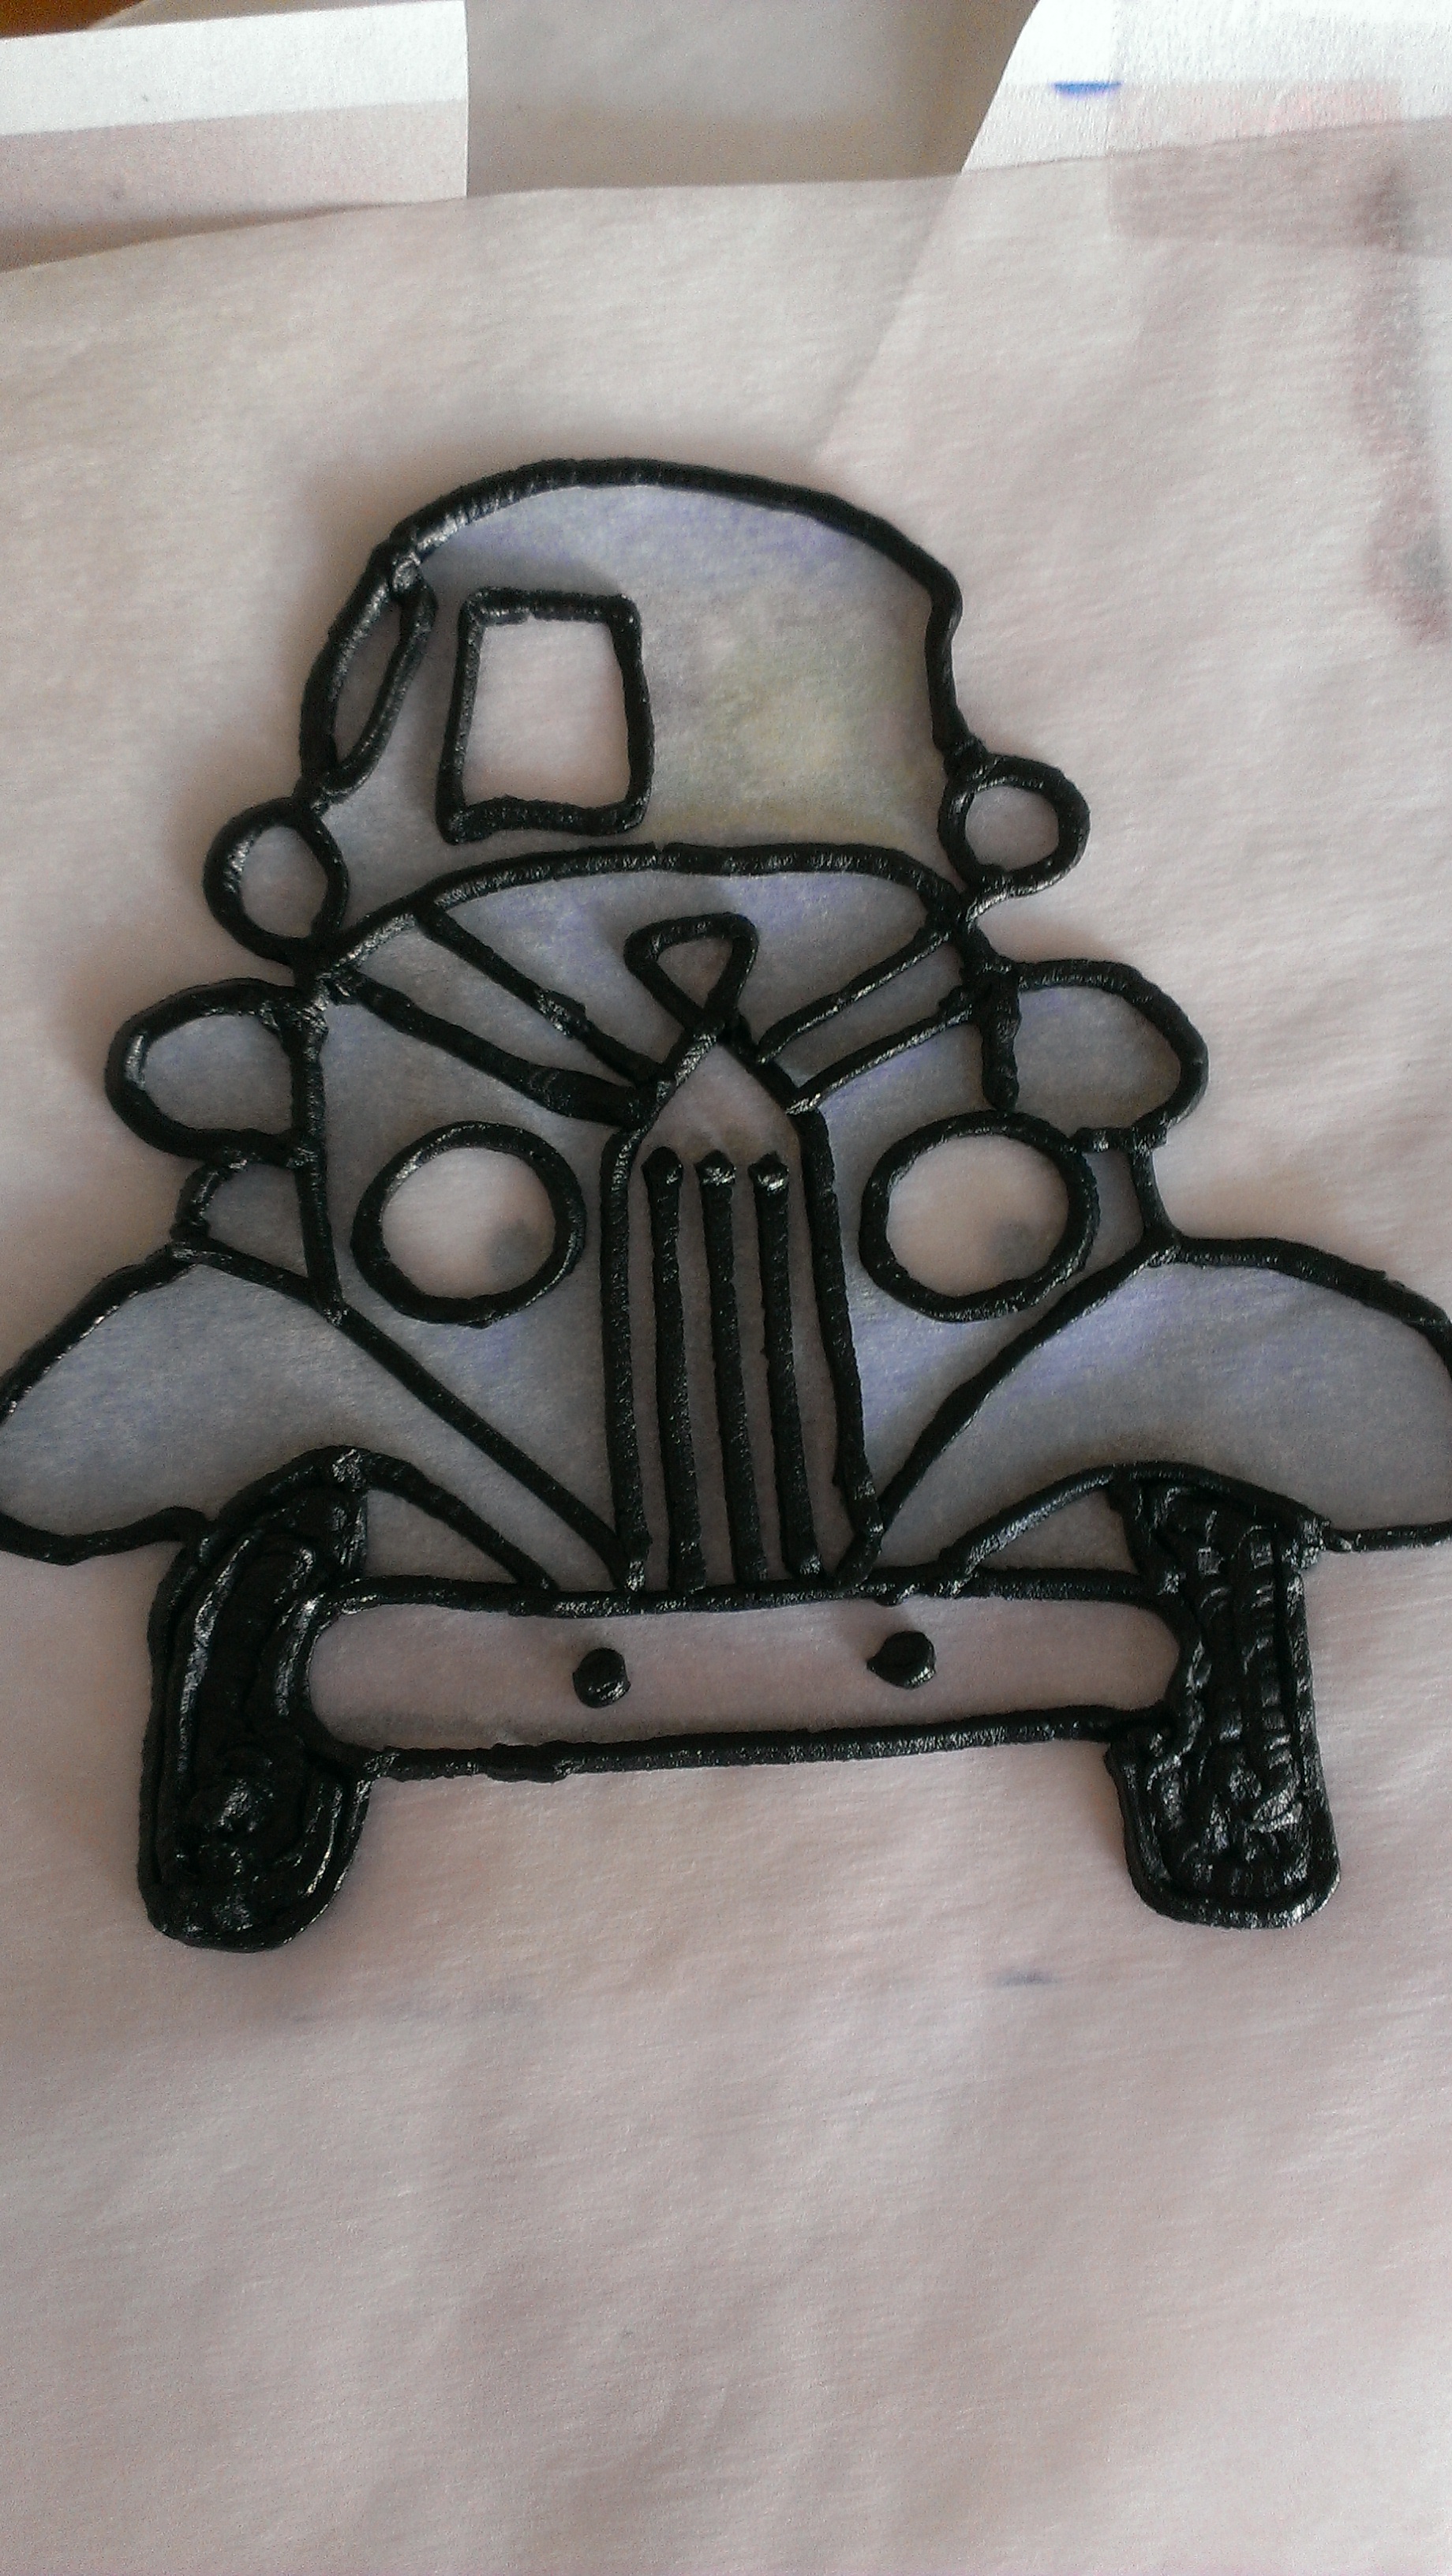
Ok, so I am not the best at drawing. I can copy a lot, but I am not great at drawing stuff without an image to go off of. I used to work with a girl that was so talented, she would put one hand on her hip and hold her piping bag in her other hand, and draw anything on a cake you could think of. She was amazing. I, however, lack that gene. So when I need an image to look really accurate, I do a transfer. This is a process where you outline a copy of the image you want on your cake. Lemme show you how…
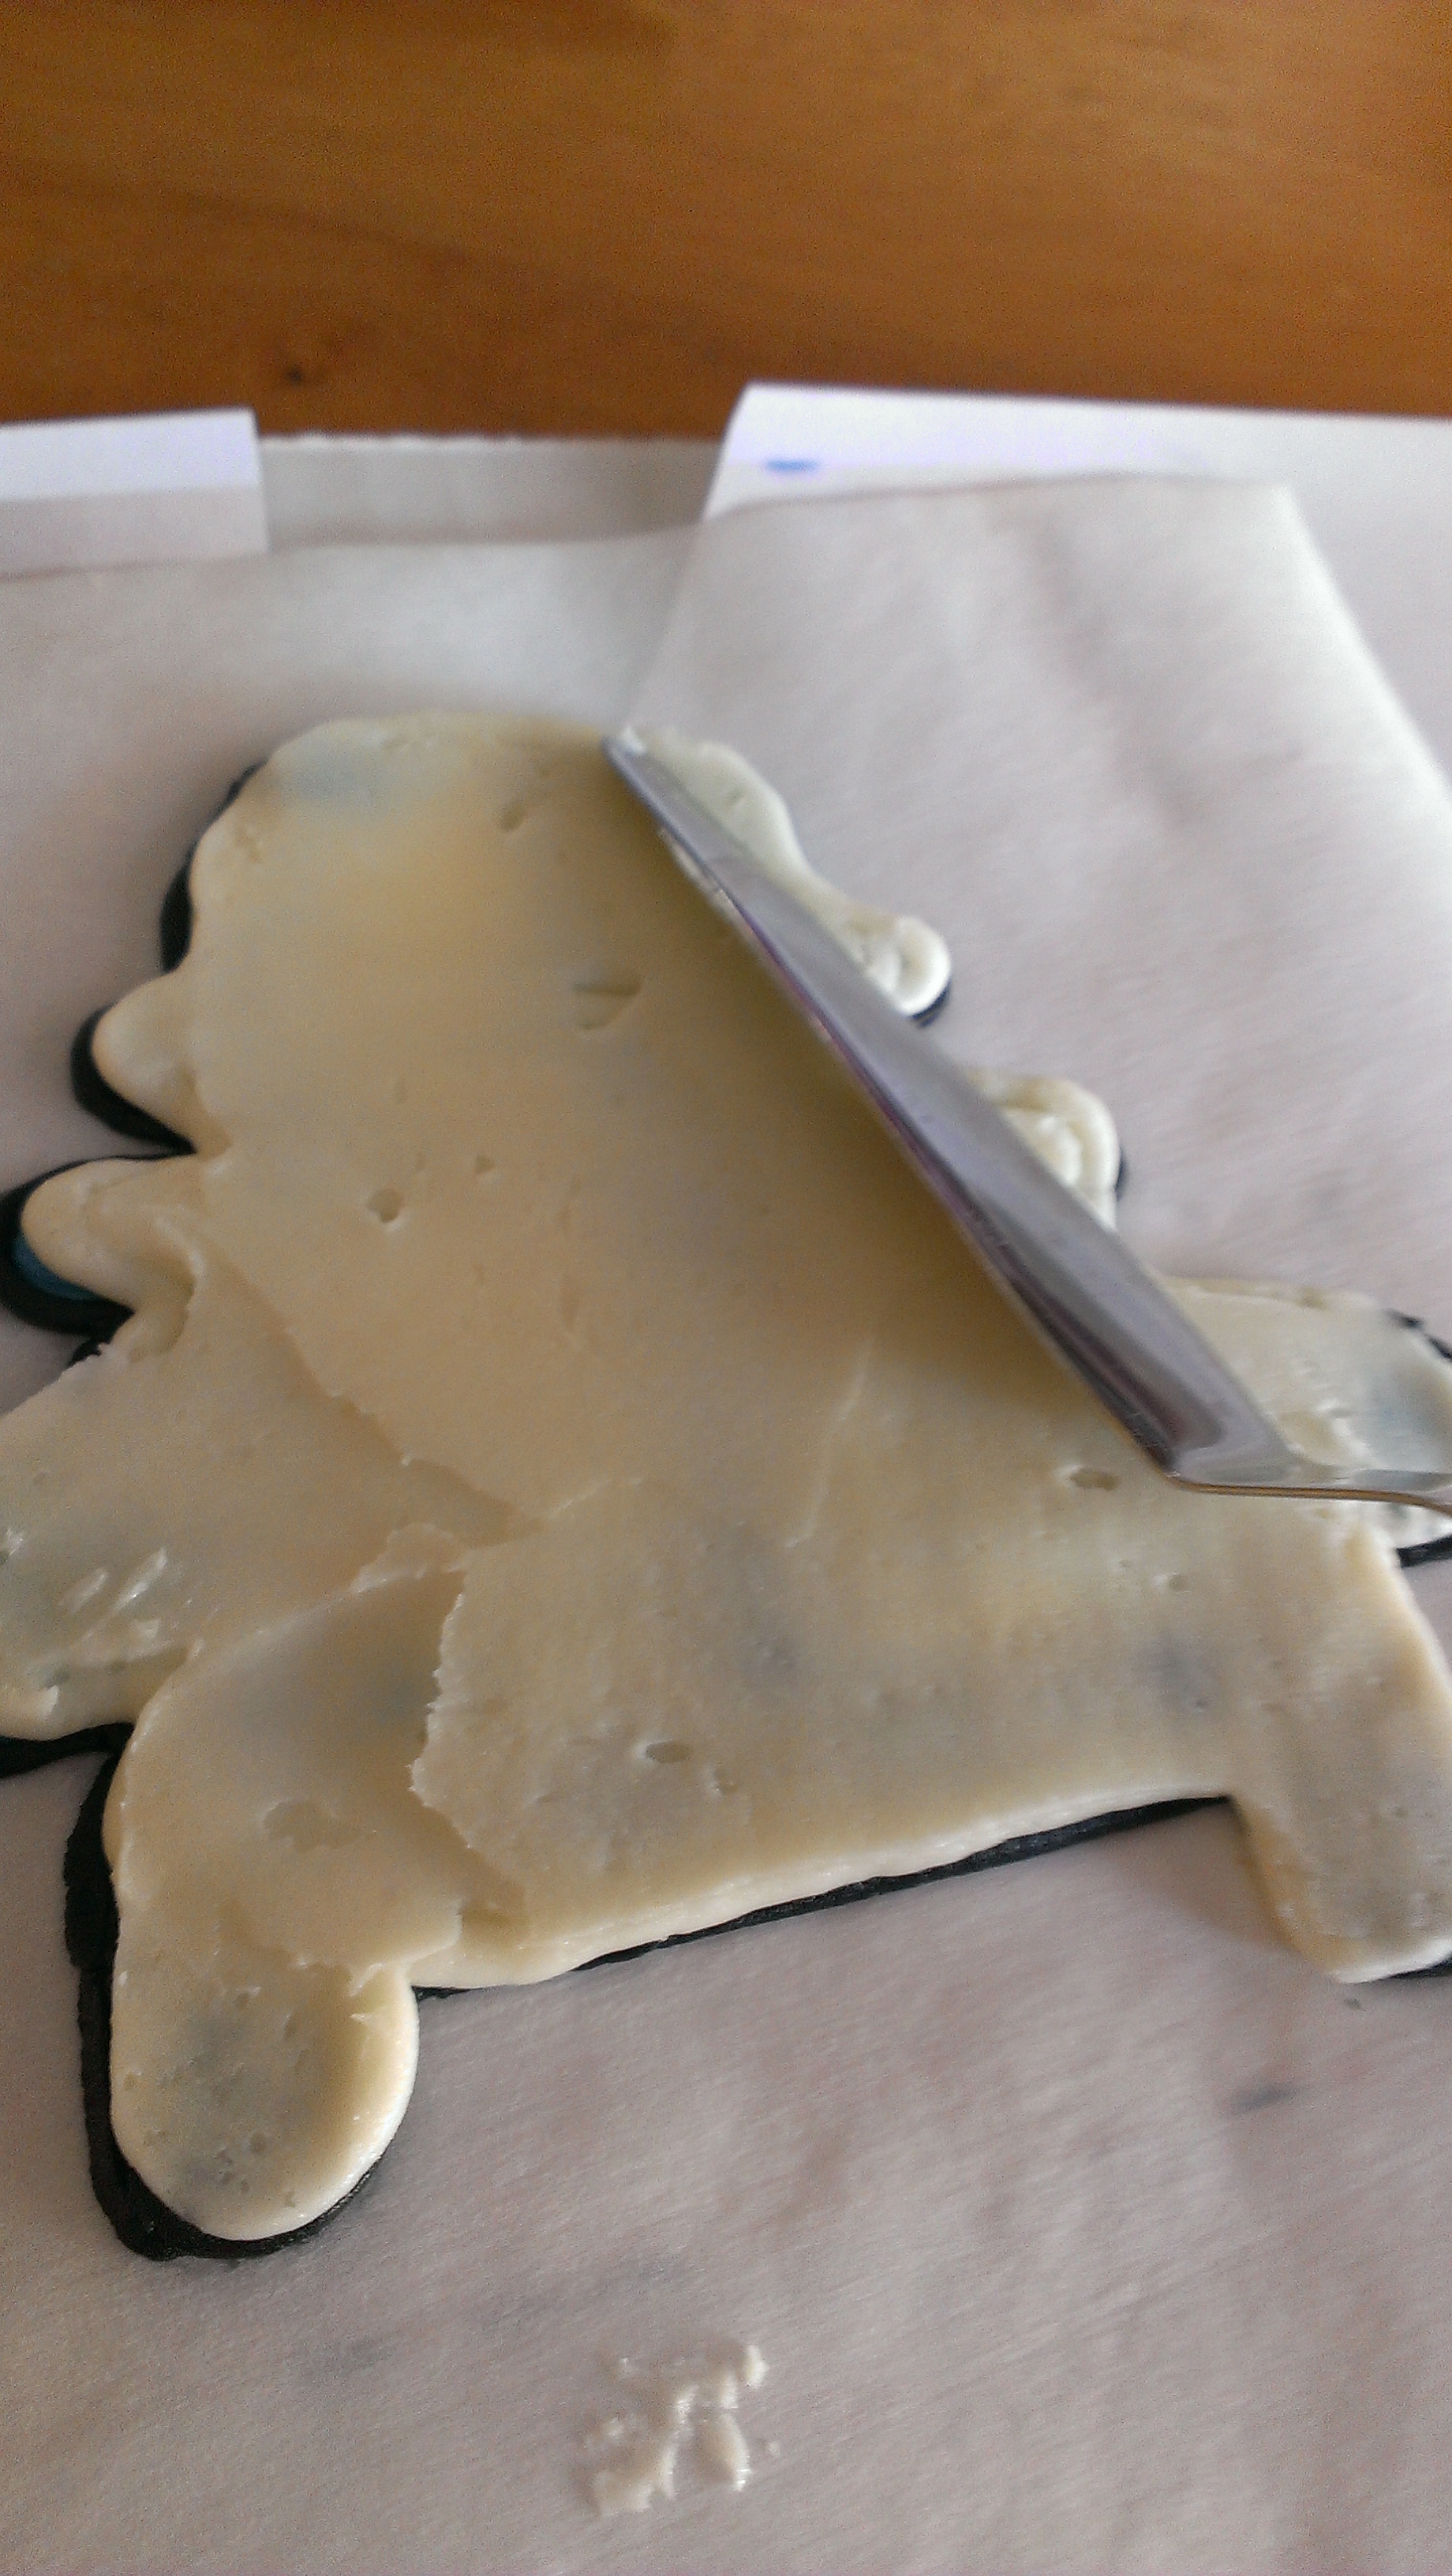
First, make a copy of your desired image. Then you cover it in a piece of parchment or wax paper. I then tape them both to a cake board.
Then, outline the image. Make sure your point is very fine so it doesn’t look sloppy
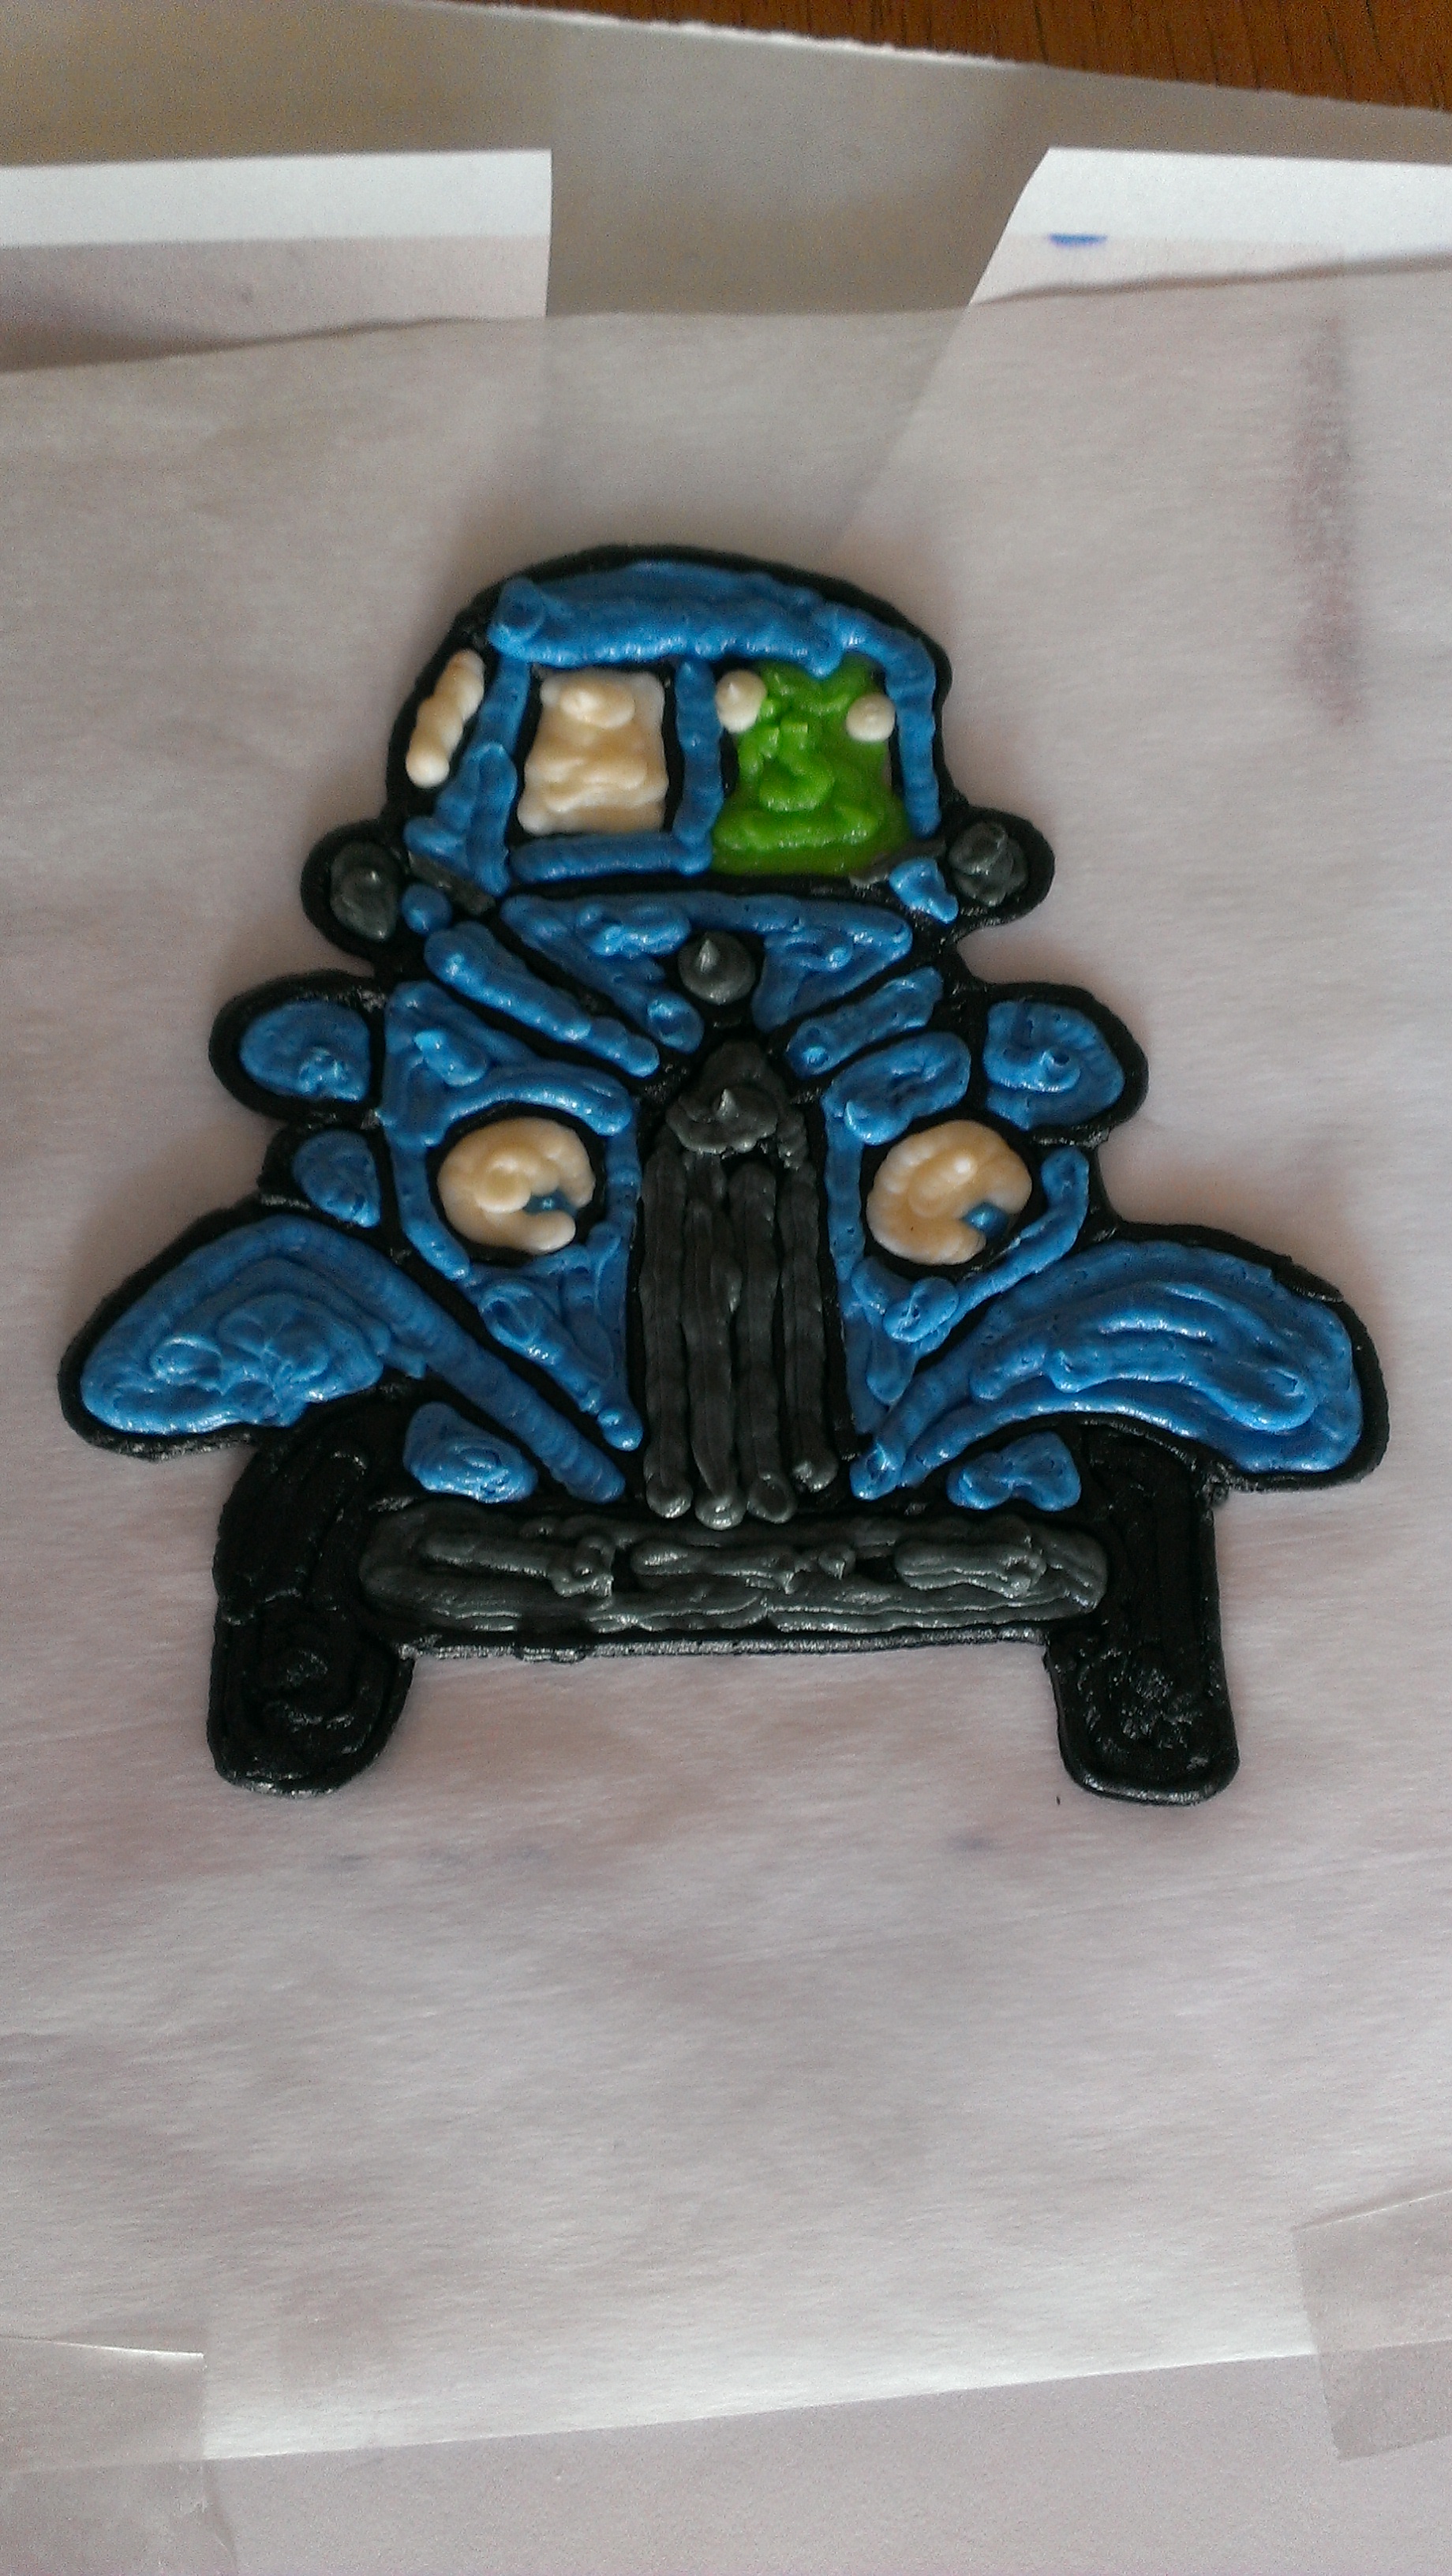
After outlining, you can fill in the colors. Try to leave no spaces in between colors and lines so it looks completely filled in.
Now that your picture is complete, pipe whatever color the cake is iced in along the entire surface. This cake was iced in white.
Next, take a small spatula and gently smooth this layer to be thin and smooth. This accomplishes two things. One, it helps to smooth the colors of your image. Secondly, it reinforces the strength of your transfer so it will be easier to place on your cake.
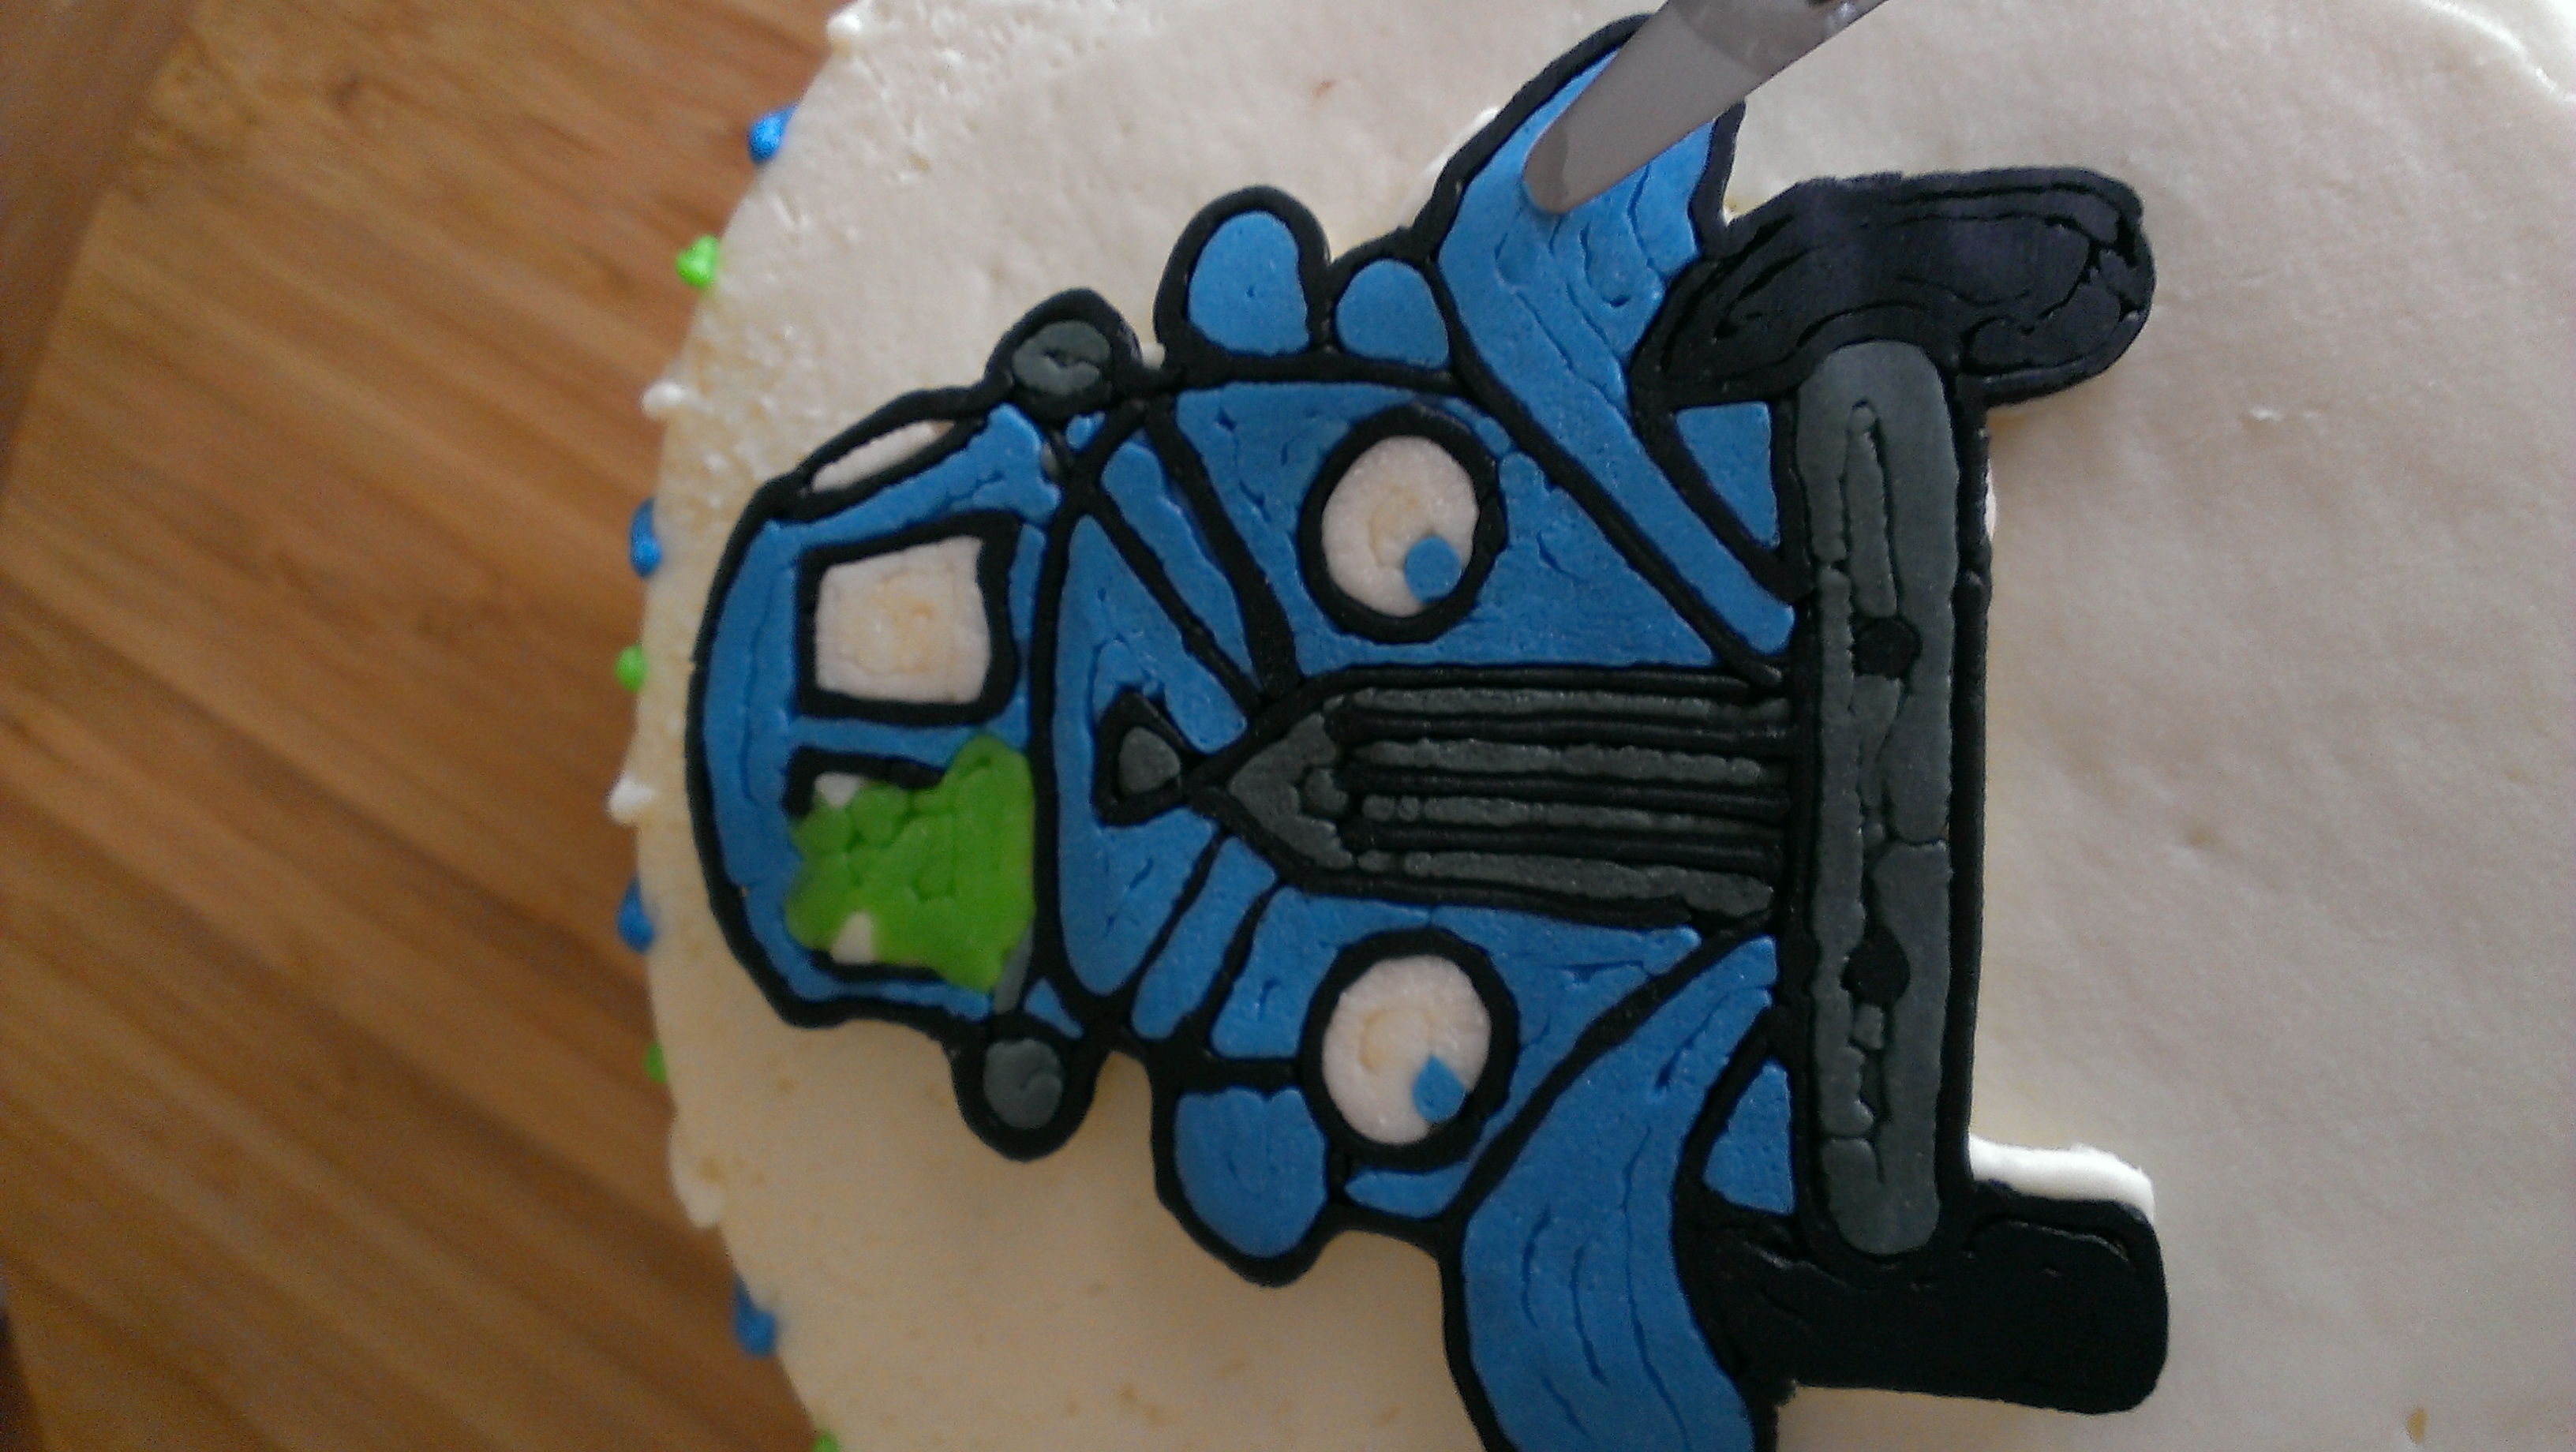
Now that it is smooth, place the image in your freezer. It usually takes about ten minutes to get solid enough to apply. It should feel firm to the touch. Your cake should be iced and smoothed to be ready for your transfer. When both the cake and transfer are ready, gently peel the parchment from the back of your transfer. Gently lay it on your cake.
There will be some lines here and there from piping the design. Using a small, pointed tip spatula, gently smooth the lines. Don’t over do it! I am guilty of this. I will smooth and smooth and smooth until I have altered the image. Accept the imperfections and know that it probably looks better than your self scrutinizing eyes will show.
Now you can add any additional touches to complete the image. This one needed some touches on the frog.
Voila! A butter cream transfer. It’s a little time consuming and tedious, but it just looks so darned good when it’s done! To save your sanity, try a couple first before you actually need one for a cake. If your practice runs turn out well, save them in your freezer for future cakes!
Ok, people…403 and likes on Facebook in my 1st 30 days!! That is amazing! You guys are the best. To thank you for your support, I have decided to have a give away! To enter, comment on this post telling me your favorite cake flavor. On Friday, 3/7, I will announce the winner. The winner will receive a half dozen cupcakes in your fave flavor or 10% off your next order up to $100. Good luck and I can’t wait to make your next cake!
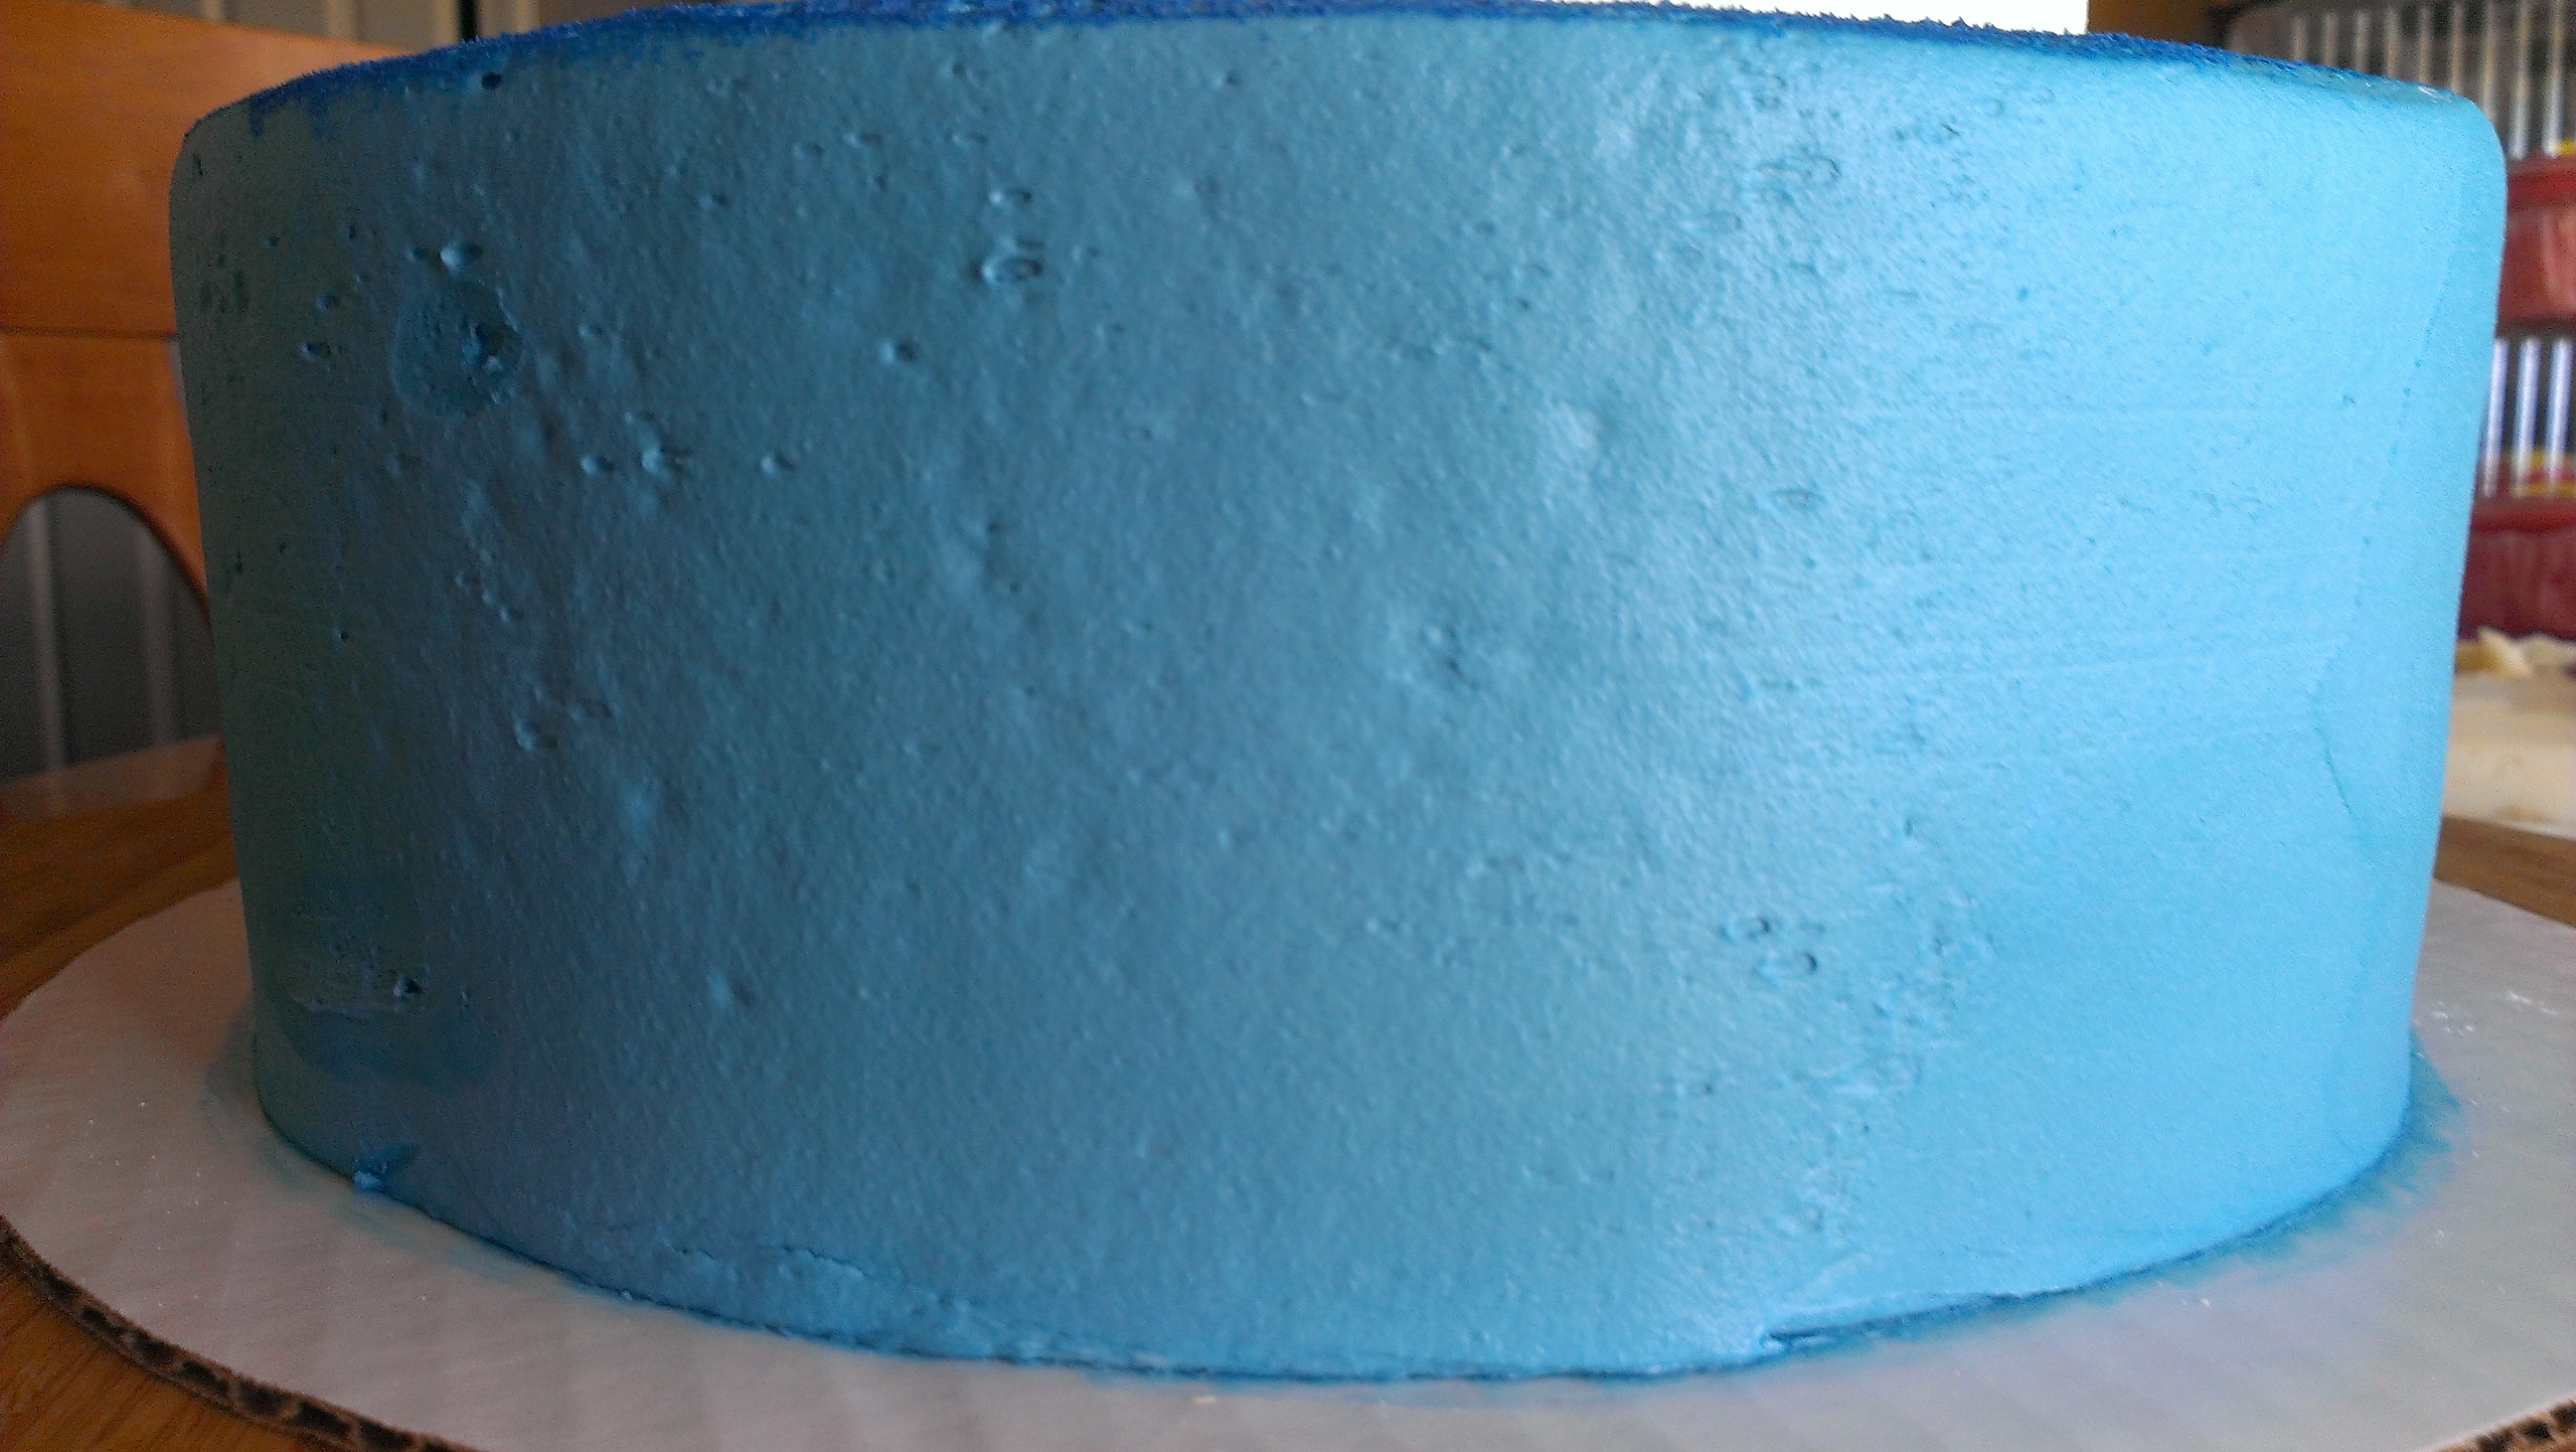
Here’s a trick that will shock you to see how easy it is. You will want to do this to your next ten cakes because it looks so fun! This is how to make your cake look like denim. First, ice your cake in a medium blue and scrape smooth.
Then, place it in the freezer until your icing is firm to the touch. For my freezer, it took about 10 minutes. This is a good time to heat up your coffee for the fourth time that morning.
(I can’t be the only one that does that, right?)
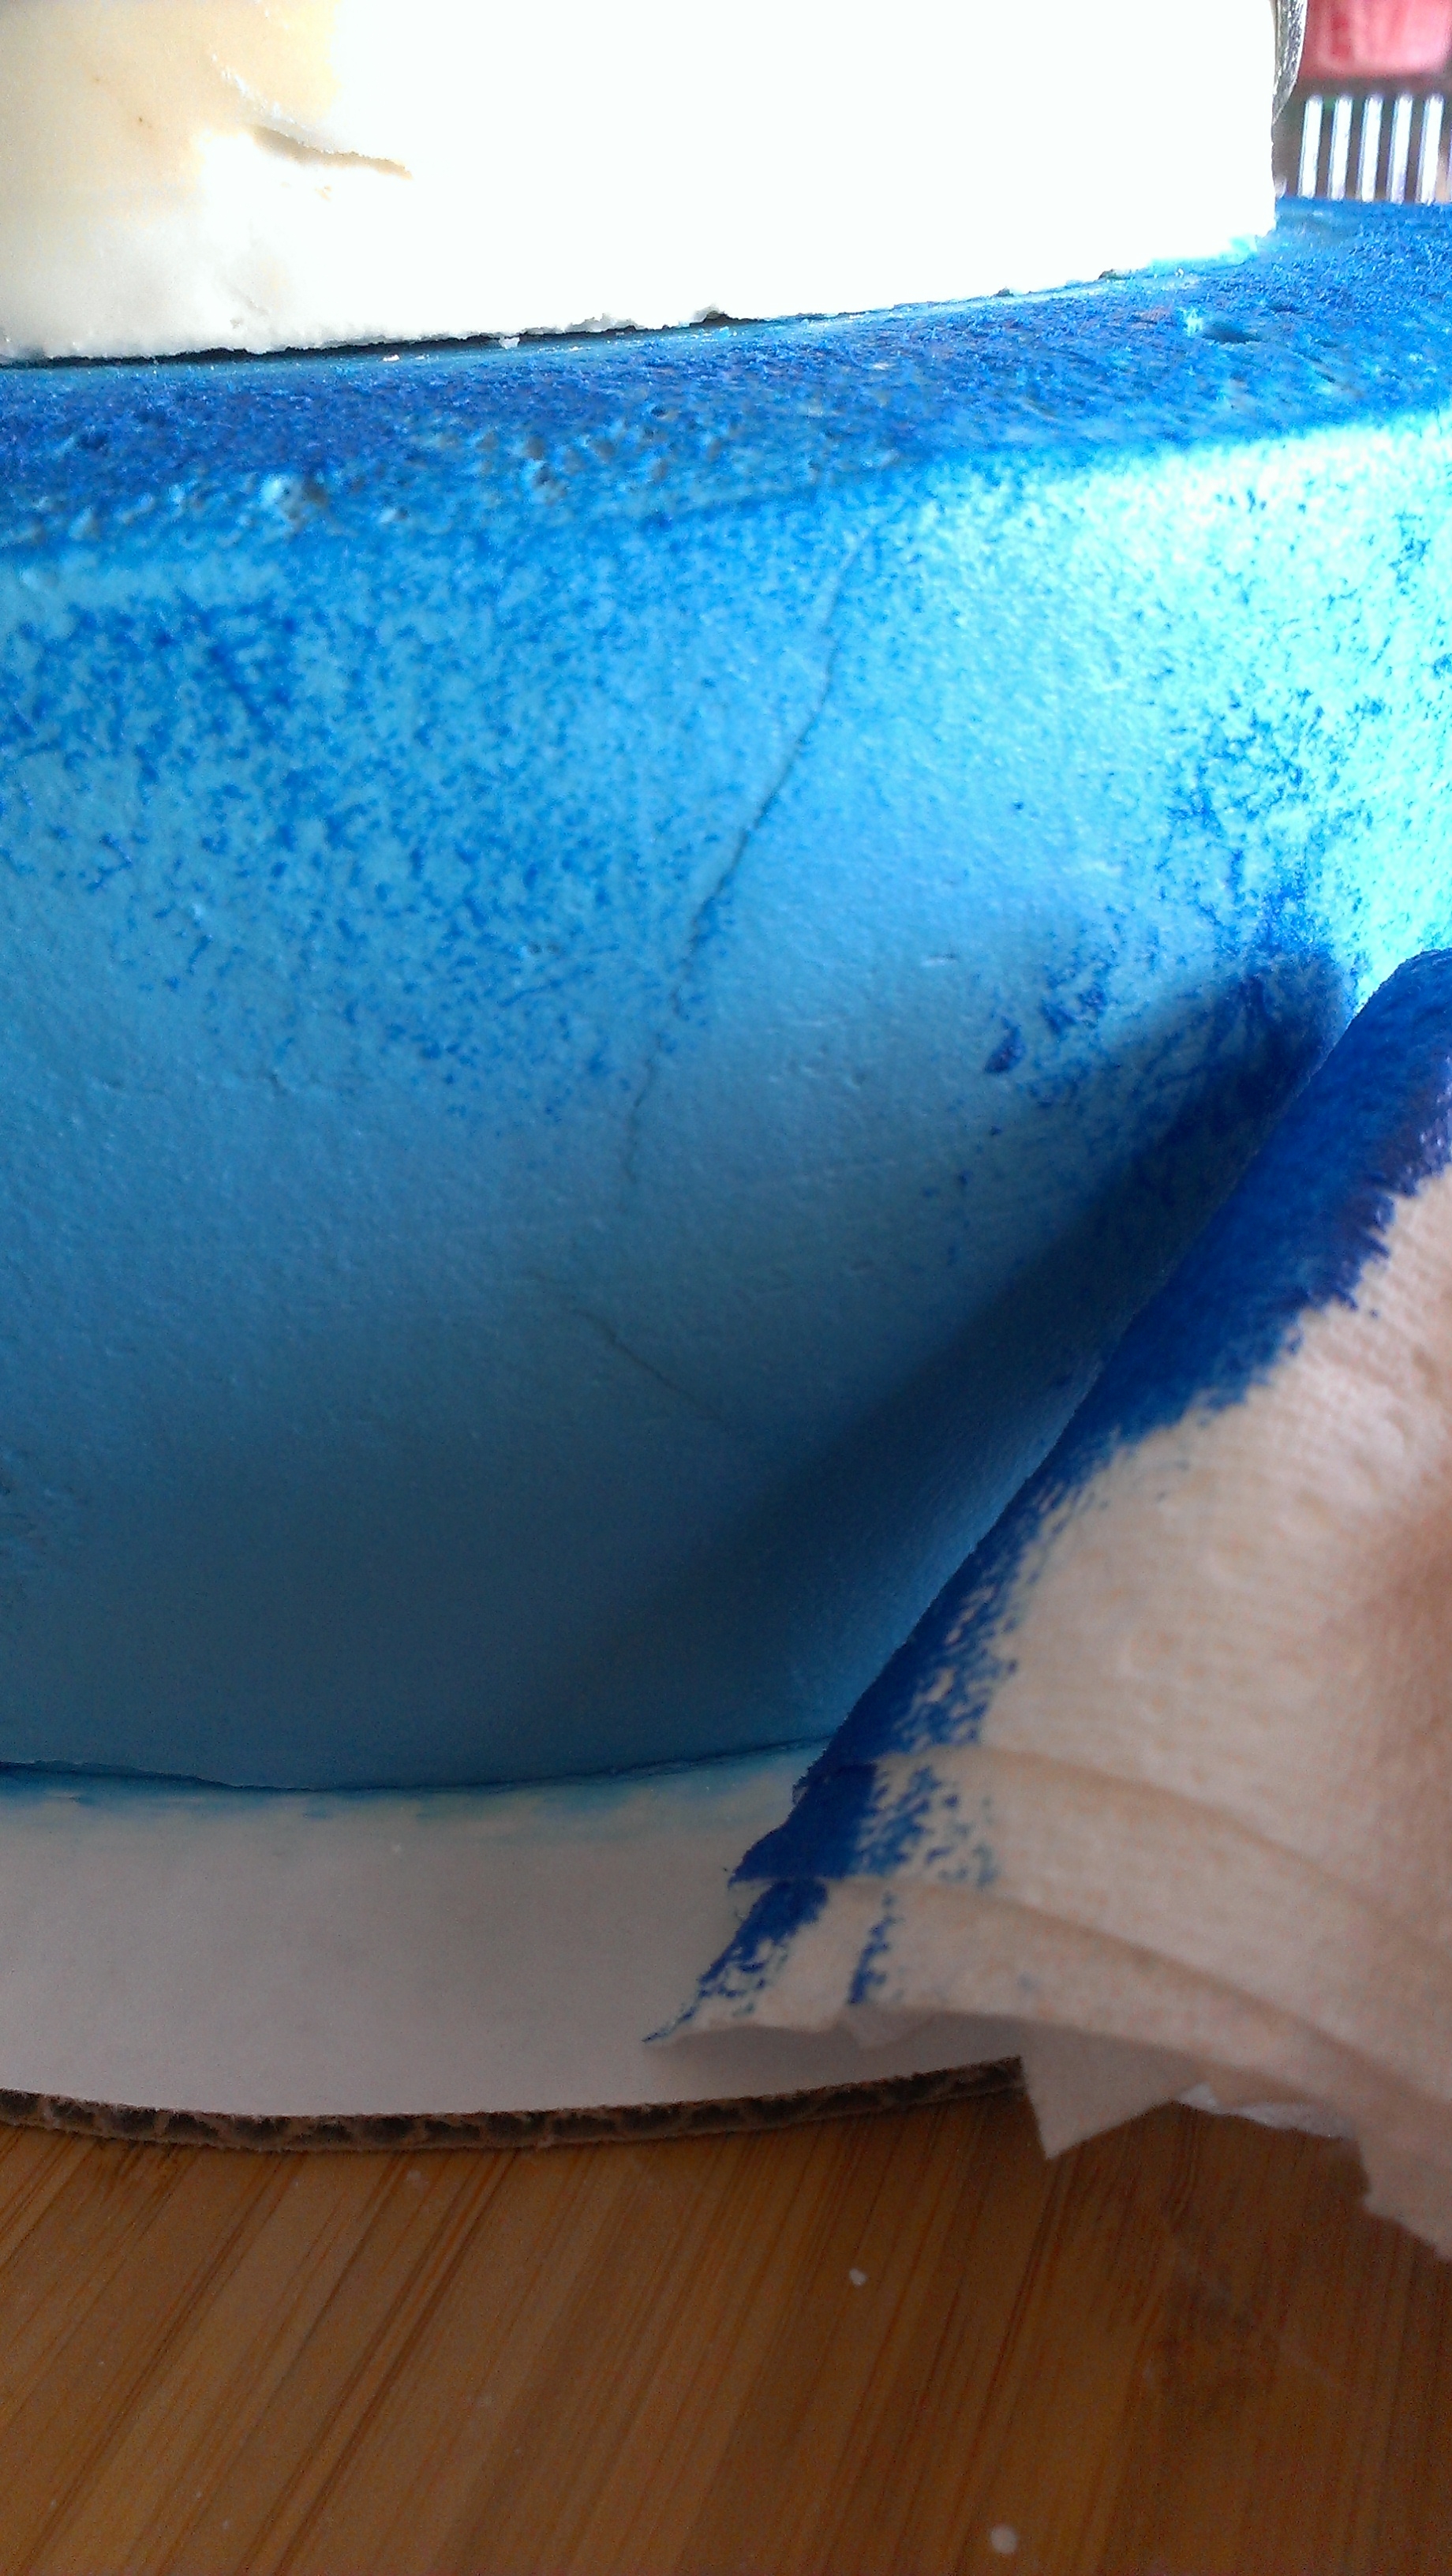
Then, mix a small amount of a much darker shade of blue. I even put in a drop of black to dull the blue a bit. When colors for things like this are too bright, they look fake. Then take a new paper towel and fold into fourths. Dip the towel into the dark blue to pick up a little bit of icing. Lightly blot the cake with the darker color.
Don’t put on too much or it will not look even. I will refold my paper towel several times to not let it get too heavy with icing. I also like to start on the top and work my way down. Don’t neglect the edge of your cake! You want it to look continuous.
Keep doing this all over the cake until it is completely covered. I then get a new towel and go over the entire cake to again make sure it is even and not too heavy.
Voila! Denim! Add a belt and saddle up, pard-ner! Did I not tell you how easy this is? Now, call all your friends you do cakes for and ask them to come up with a need for a denim look cake. You know you are DYING to try this. Happy decorating!
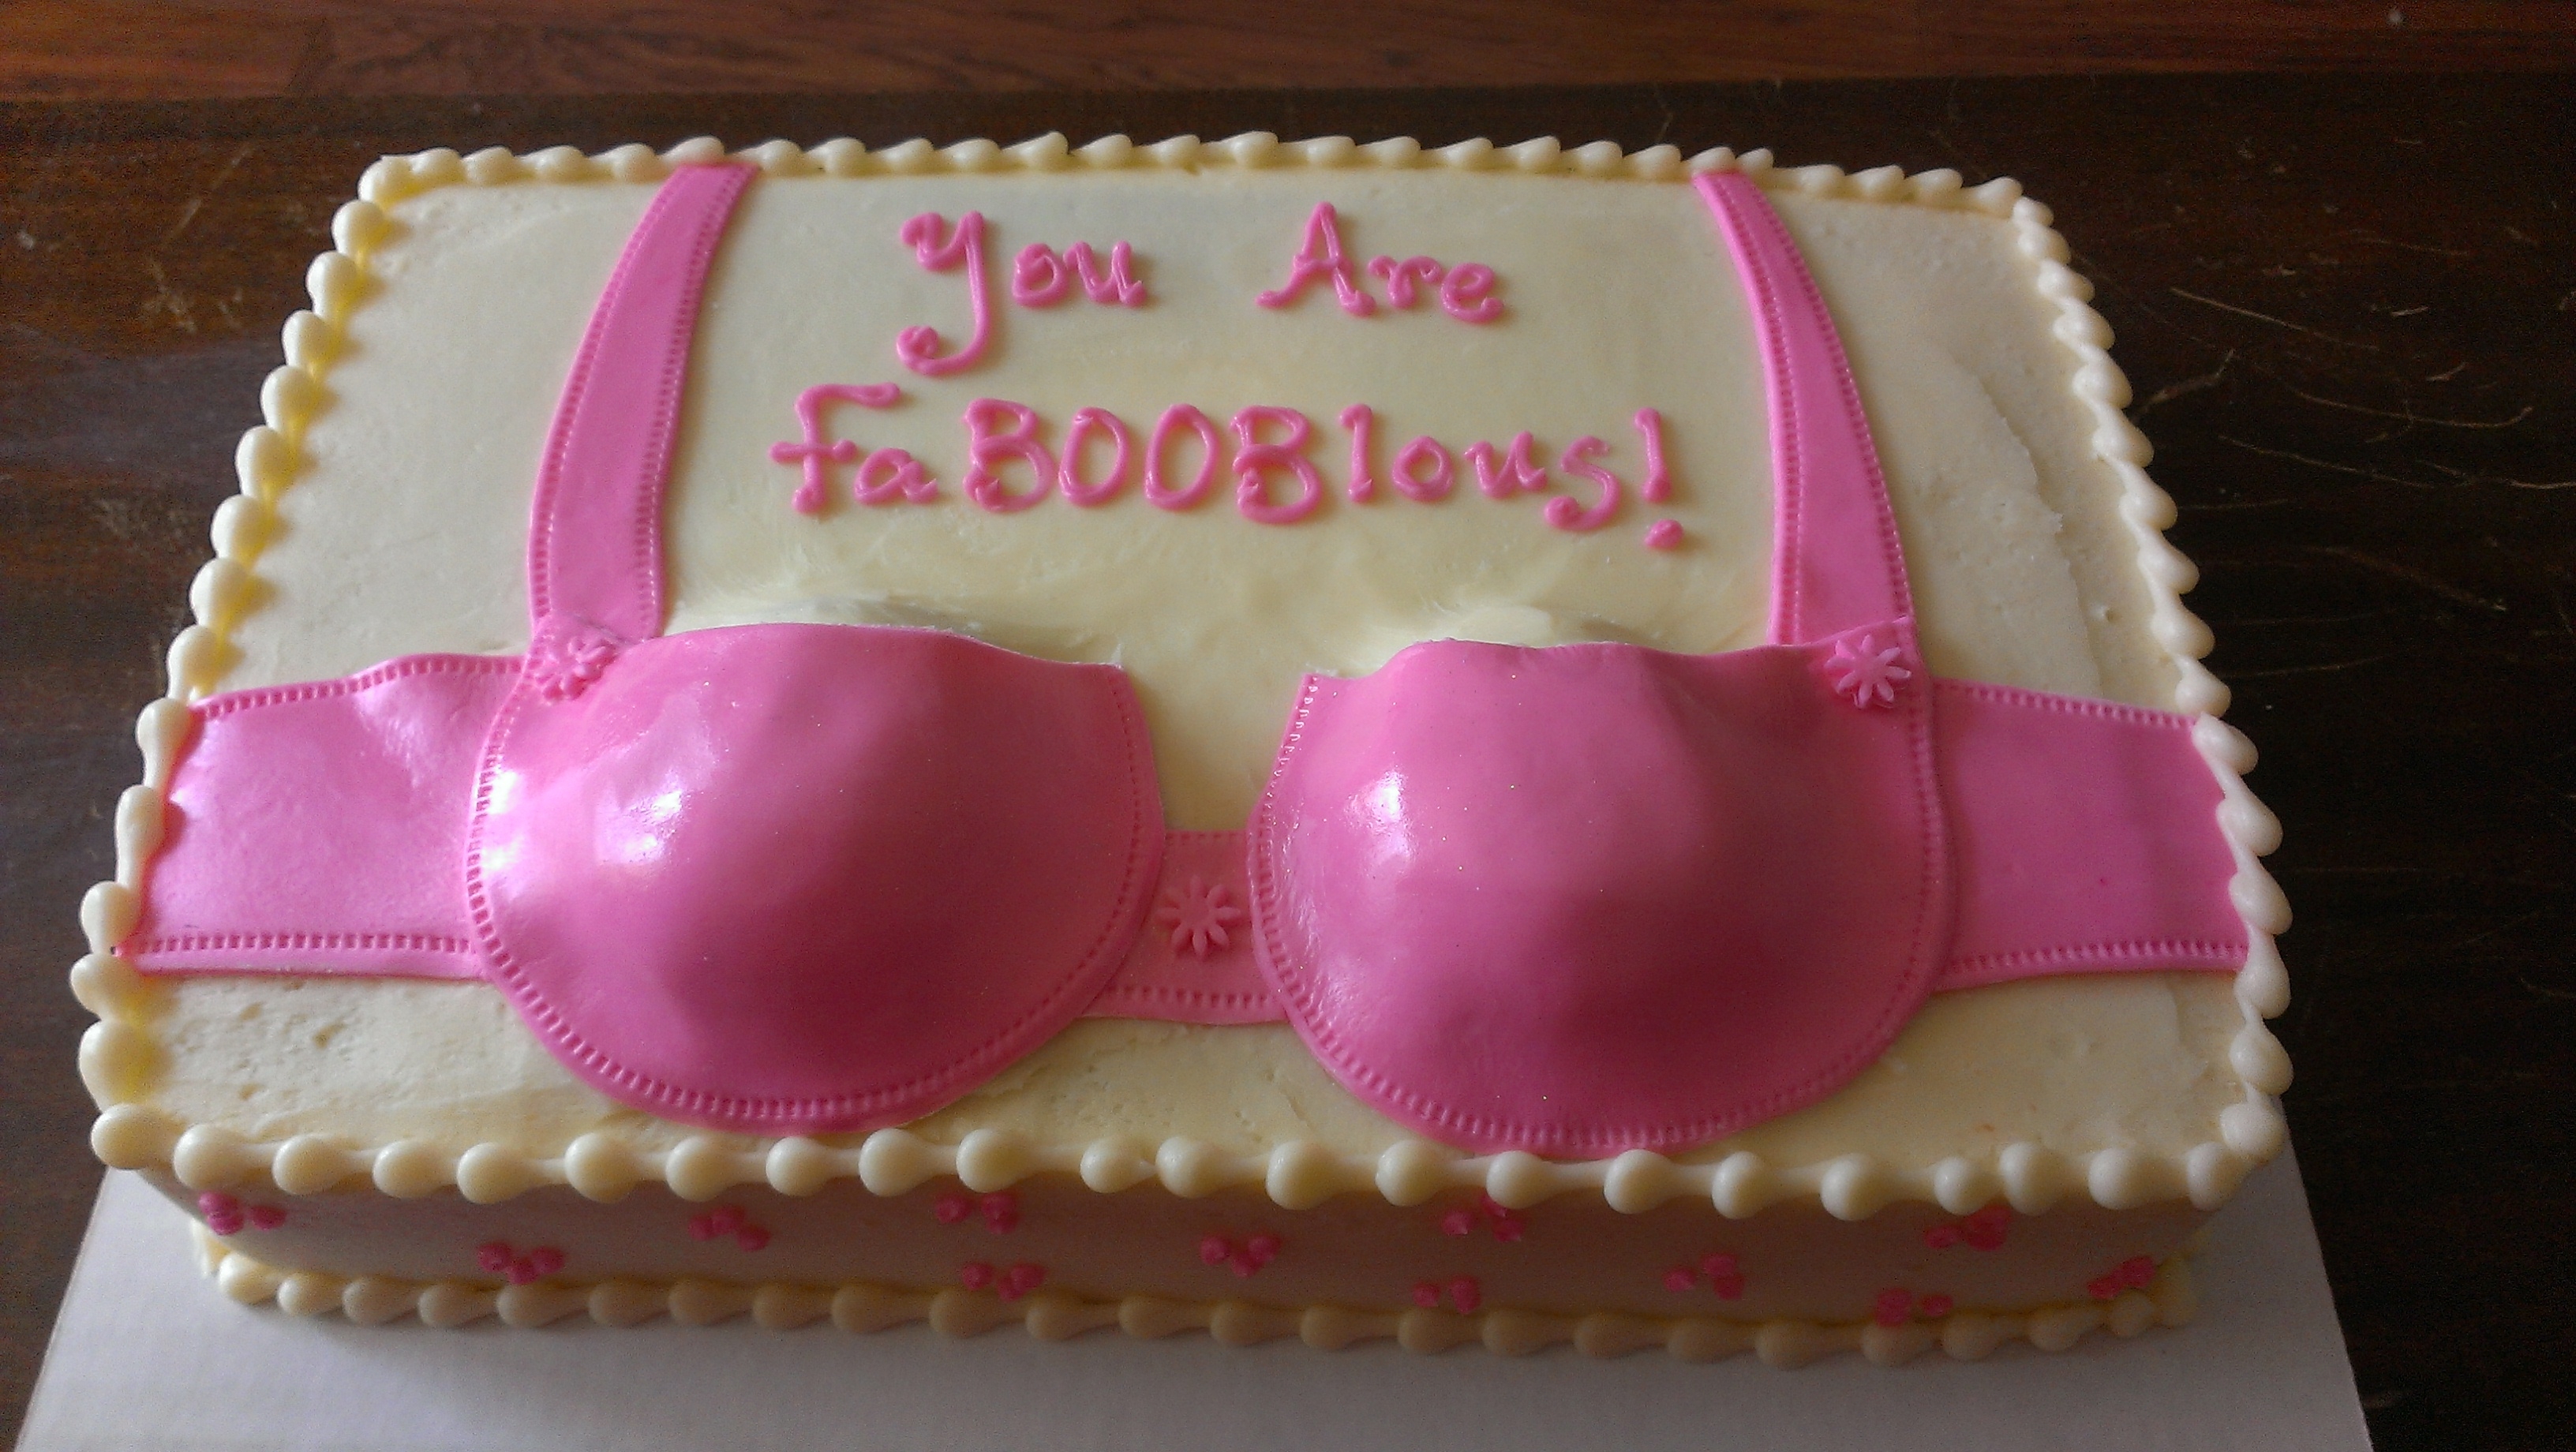
This cake was a special opportunity for me. A friend of mine works with a gal who finished up her chemo last week for breast cancer. They threw her a celebration dinner and needed a cake. I normally don’t do anything risque, but a cancer victory merits an exception! Last night I got the sweetest thank you email from the honoree which made stepping out of my comfort zone completely worth it.
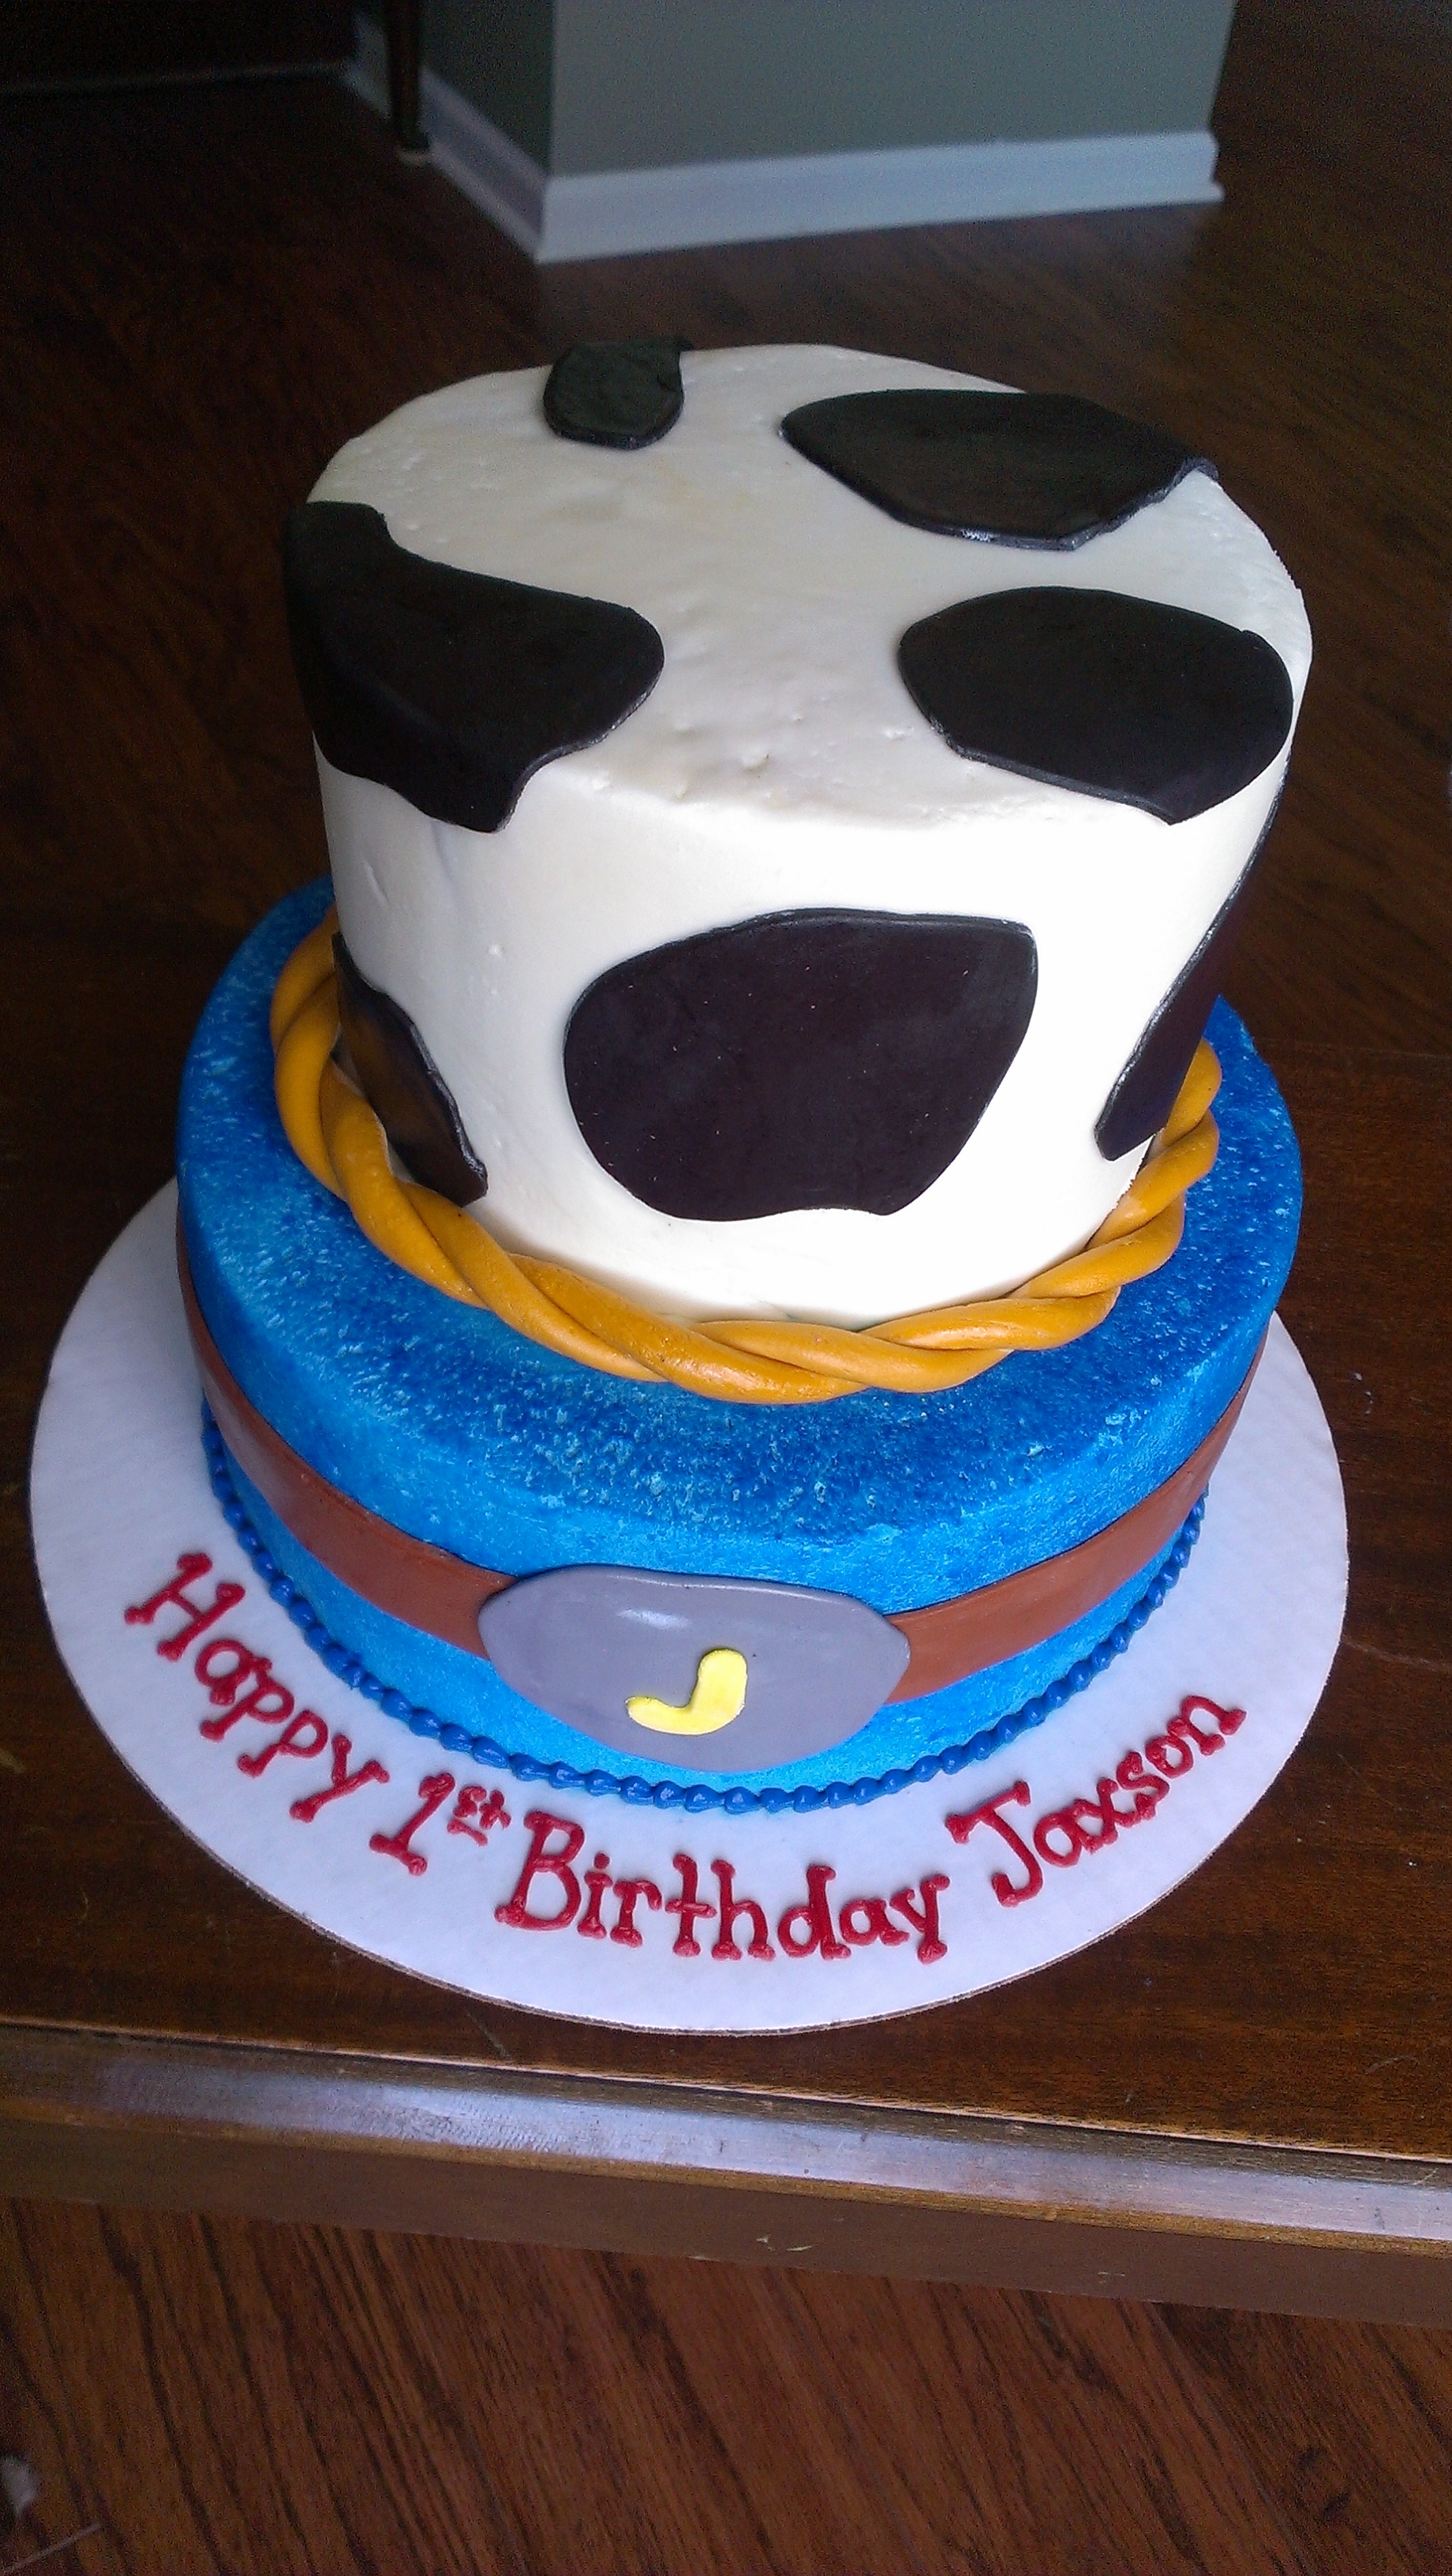
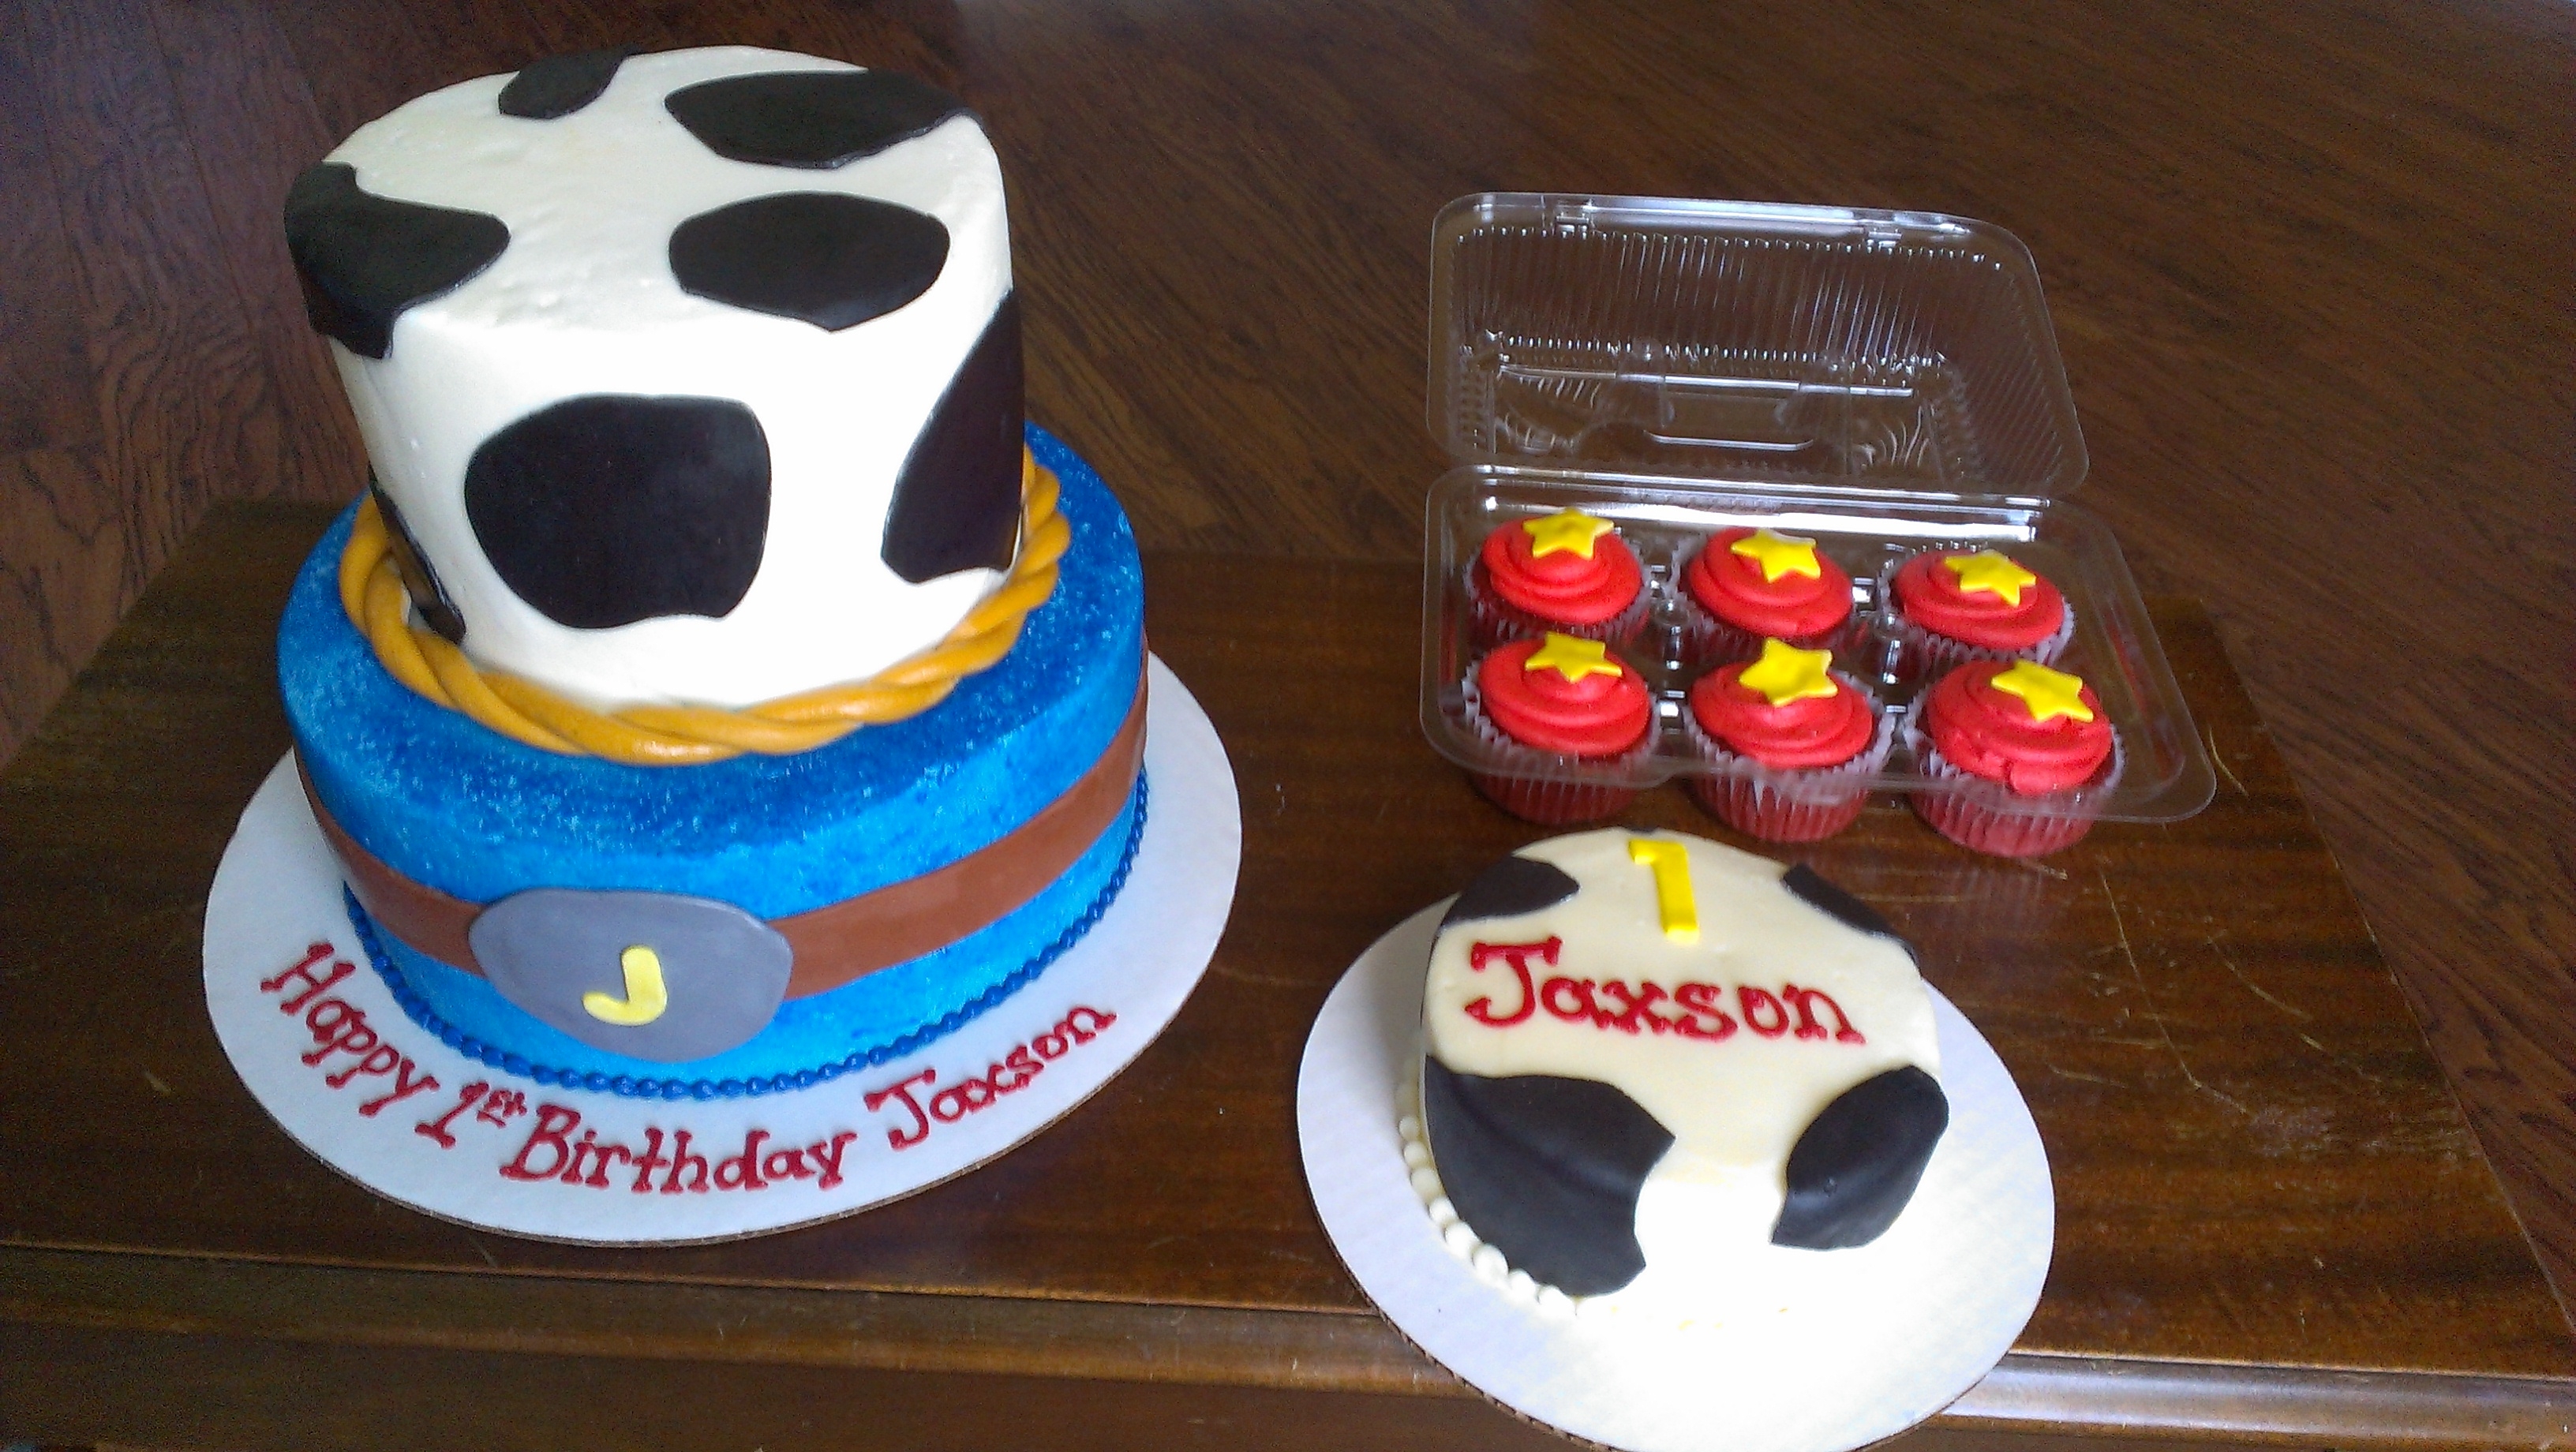
This trio was for a little cowboy’s first birthday. There were 3 dozen cupcakes with it, but you guys get the idea. My readers are super clever, after all.
This one was for a dear friend’s parents celebrating their 39th wedding anniversary. What an accomplishment. In this day and age, people don’t always stay married 39 days, let alone years. God bless you, Conner family!
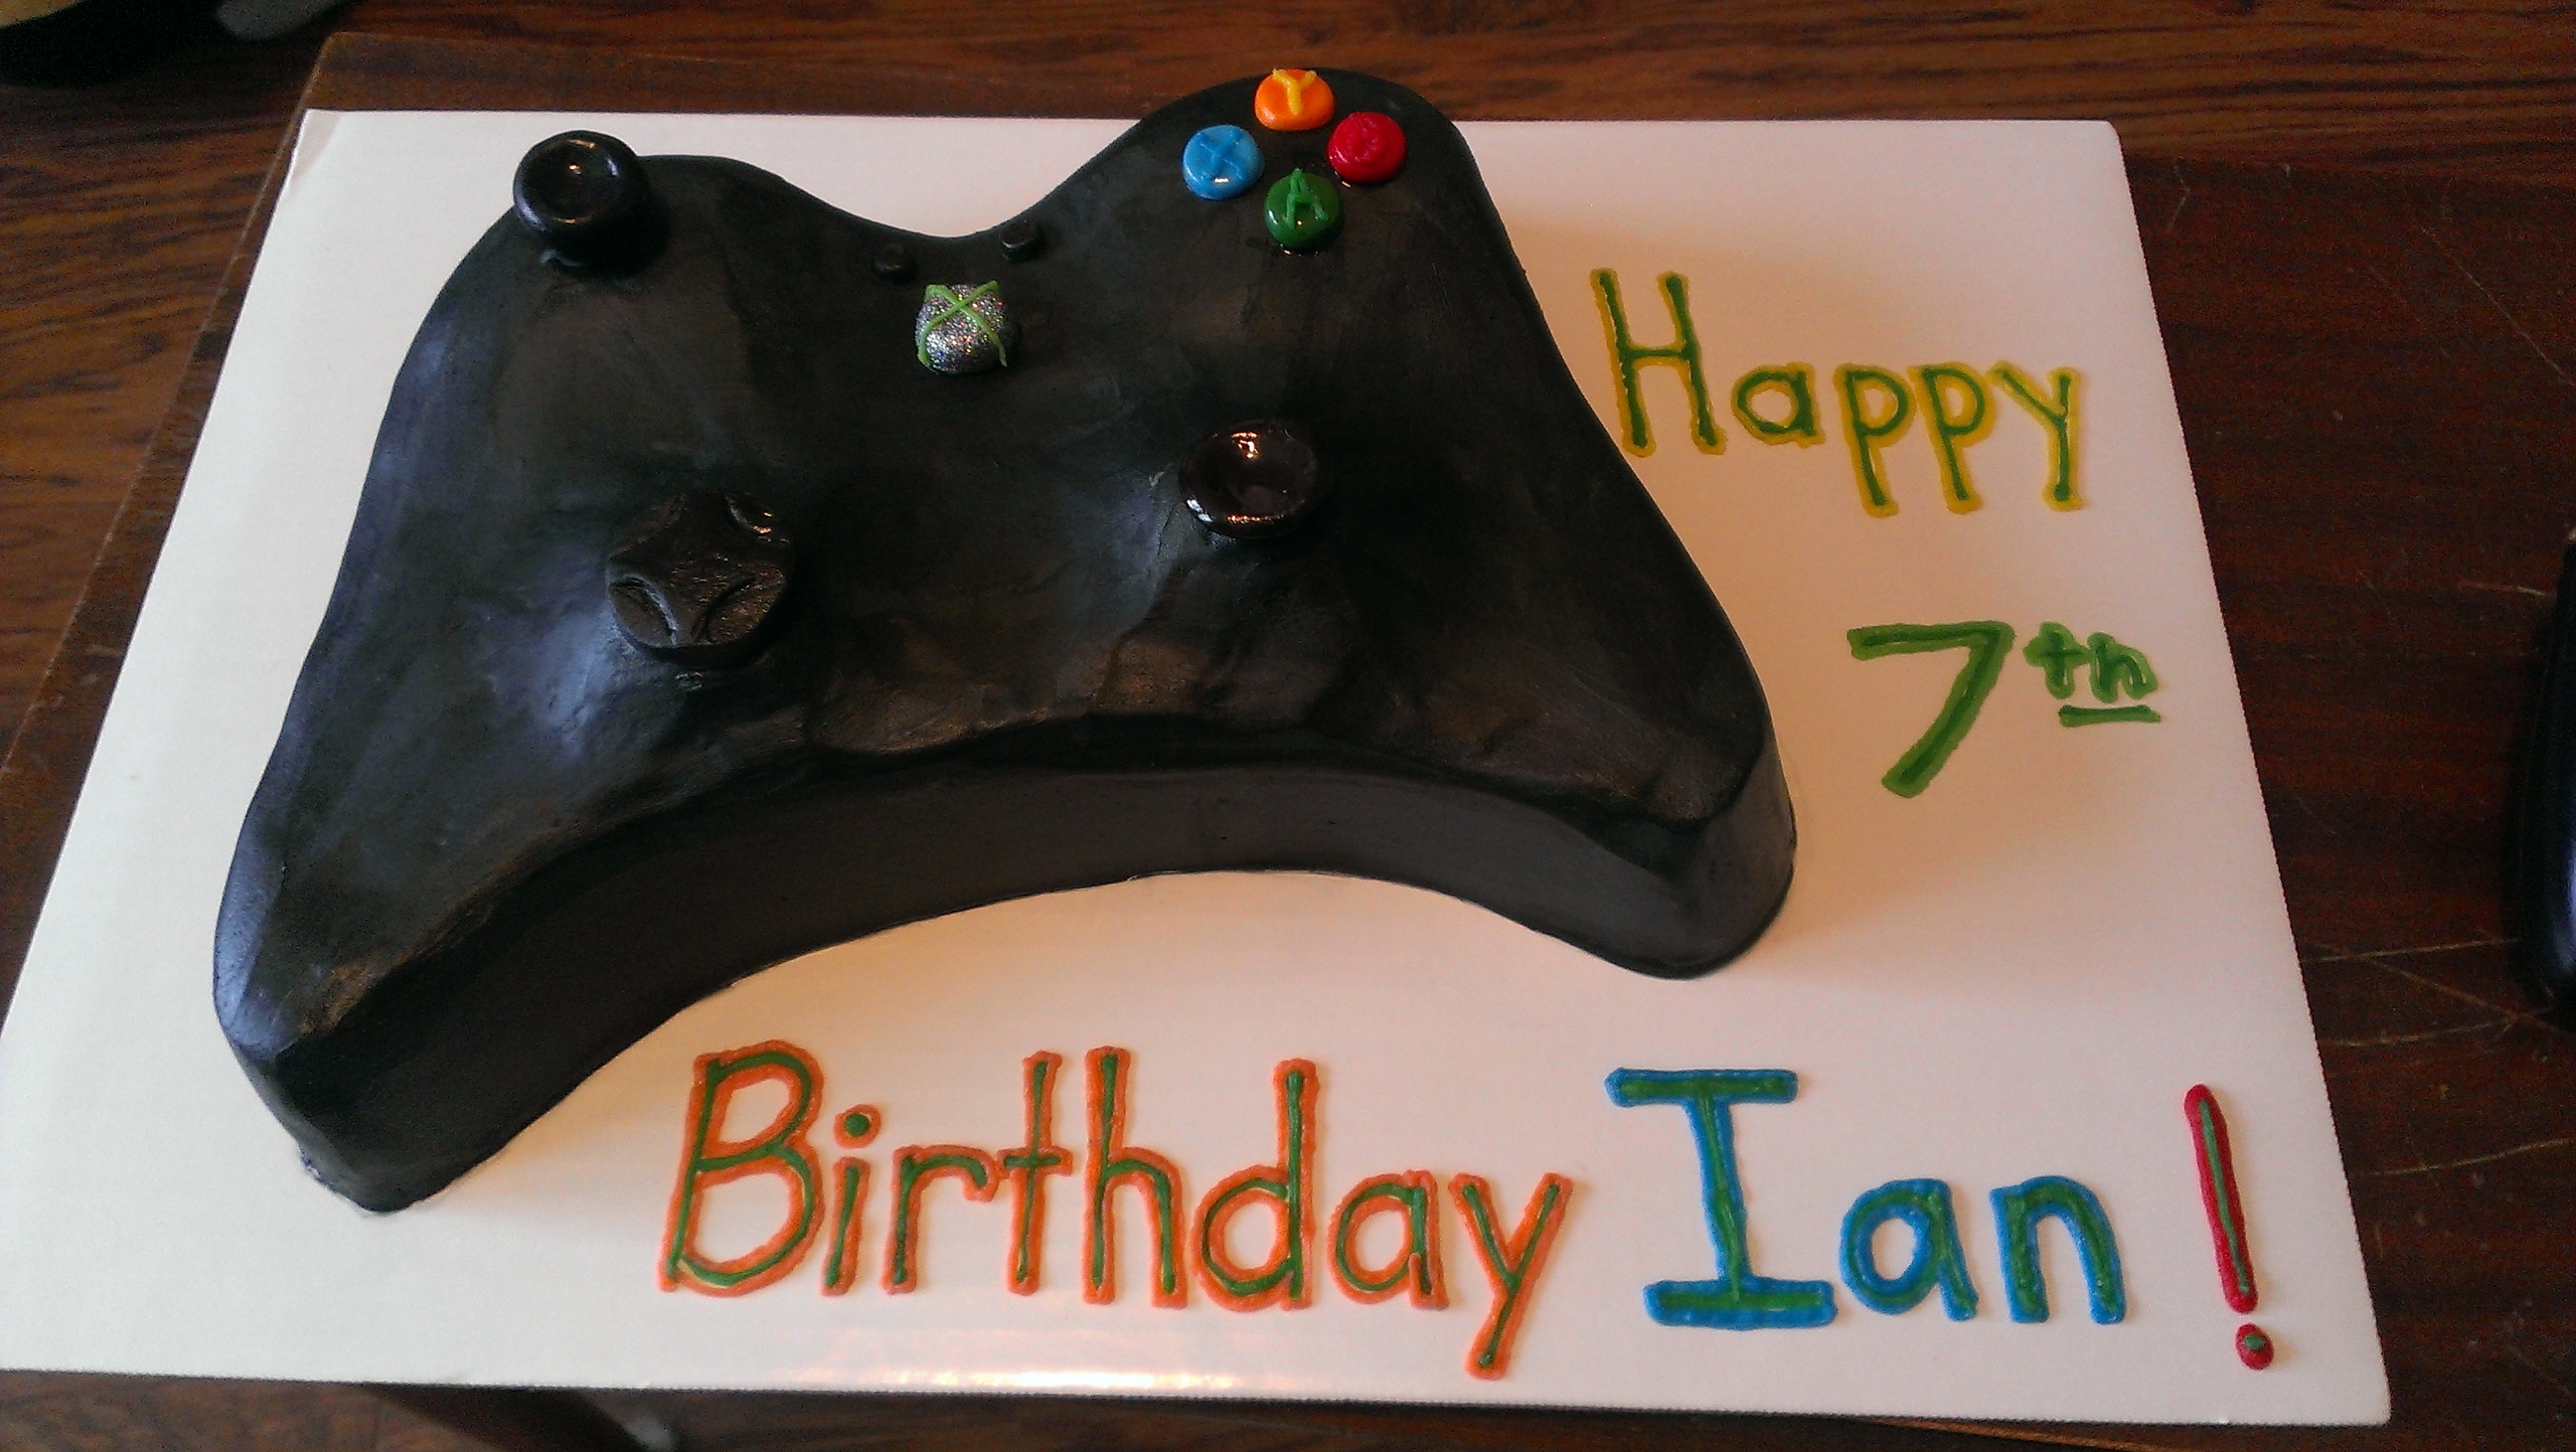
Ok, touchy subject coming. Brace yourselves. Those of you that decorate cakes, it’s confession time. Raise your hand if you have bought a pre-shaped pan and then covered the design with star tipped icing. Eh-hem, ma’am. Yes, you at your computer sipping coffee. Hand up, please. We all have. And what do we do with those pans that are only good for one design of cake? Nothing! They sit on a shelf until a garage sale takes them away. I have done it too, people. I did a Blues Clues cake for a friend ten years ago and her daughter was absolutely thrilled. But the thing is, if you like decorating cakes and want to improve your skills, try sculpting a cake! It seems daunting, I know. But really, it just takes patience and a few extra steps.
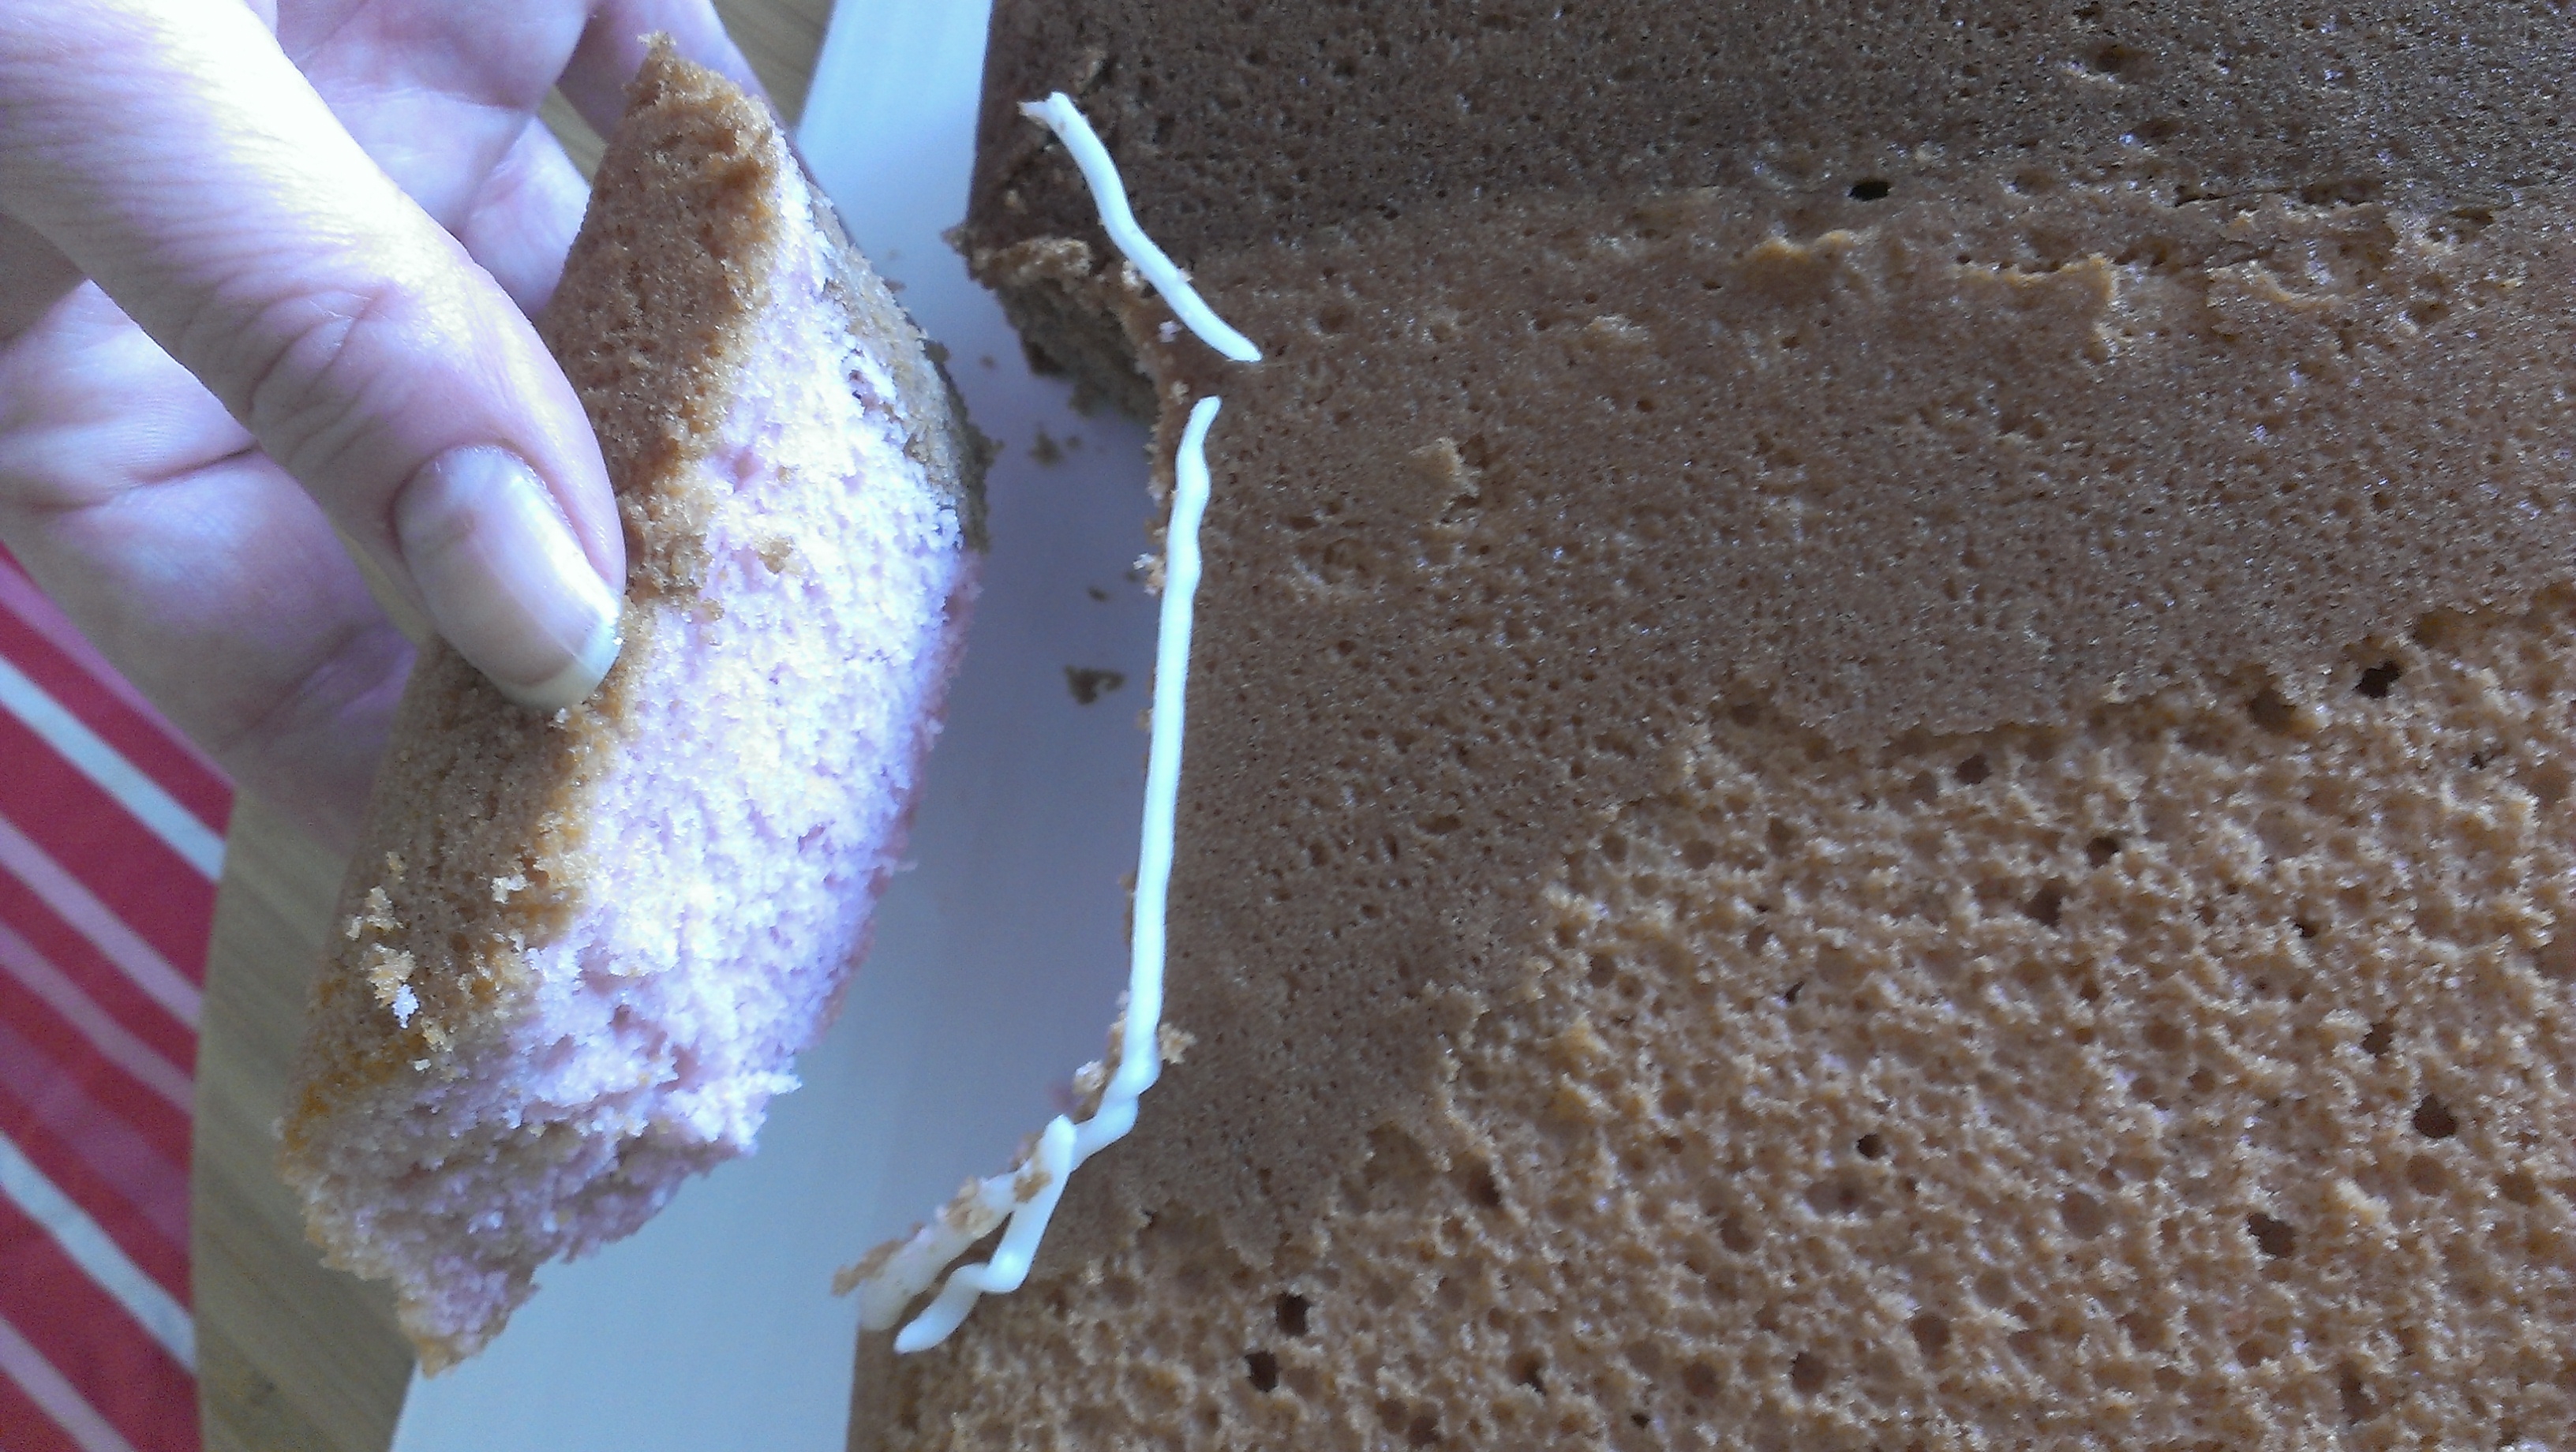
First, bake a cake that is the best suited to the shape you are after. For example, this week I made a game controller cake for my son’s birthday and started with a sheet cake. He turned 7 and we had a video game truck come to the house. This turned out to be surprisingly easy and only took a total of 2 1/2 hours of work (not including chilling time). I started with a 1/3 sheet cake. You will notice it’s two different colors in the pictures and that’s because it’s 2/3 root beer and 1/3 cherry*.
*Occupational hazard of being a cake decorator: Your children get very specific as to what they request. Refer to my 1/2 and 1/2 post to see how to have side by side flavors.
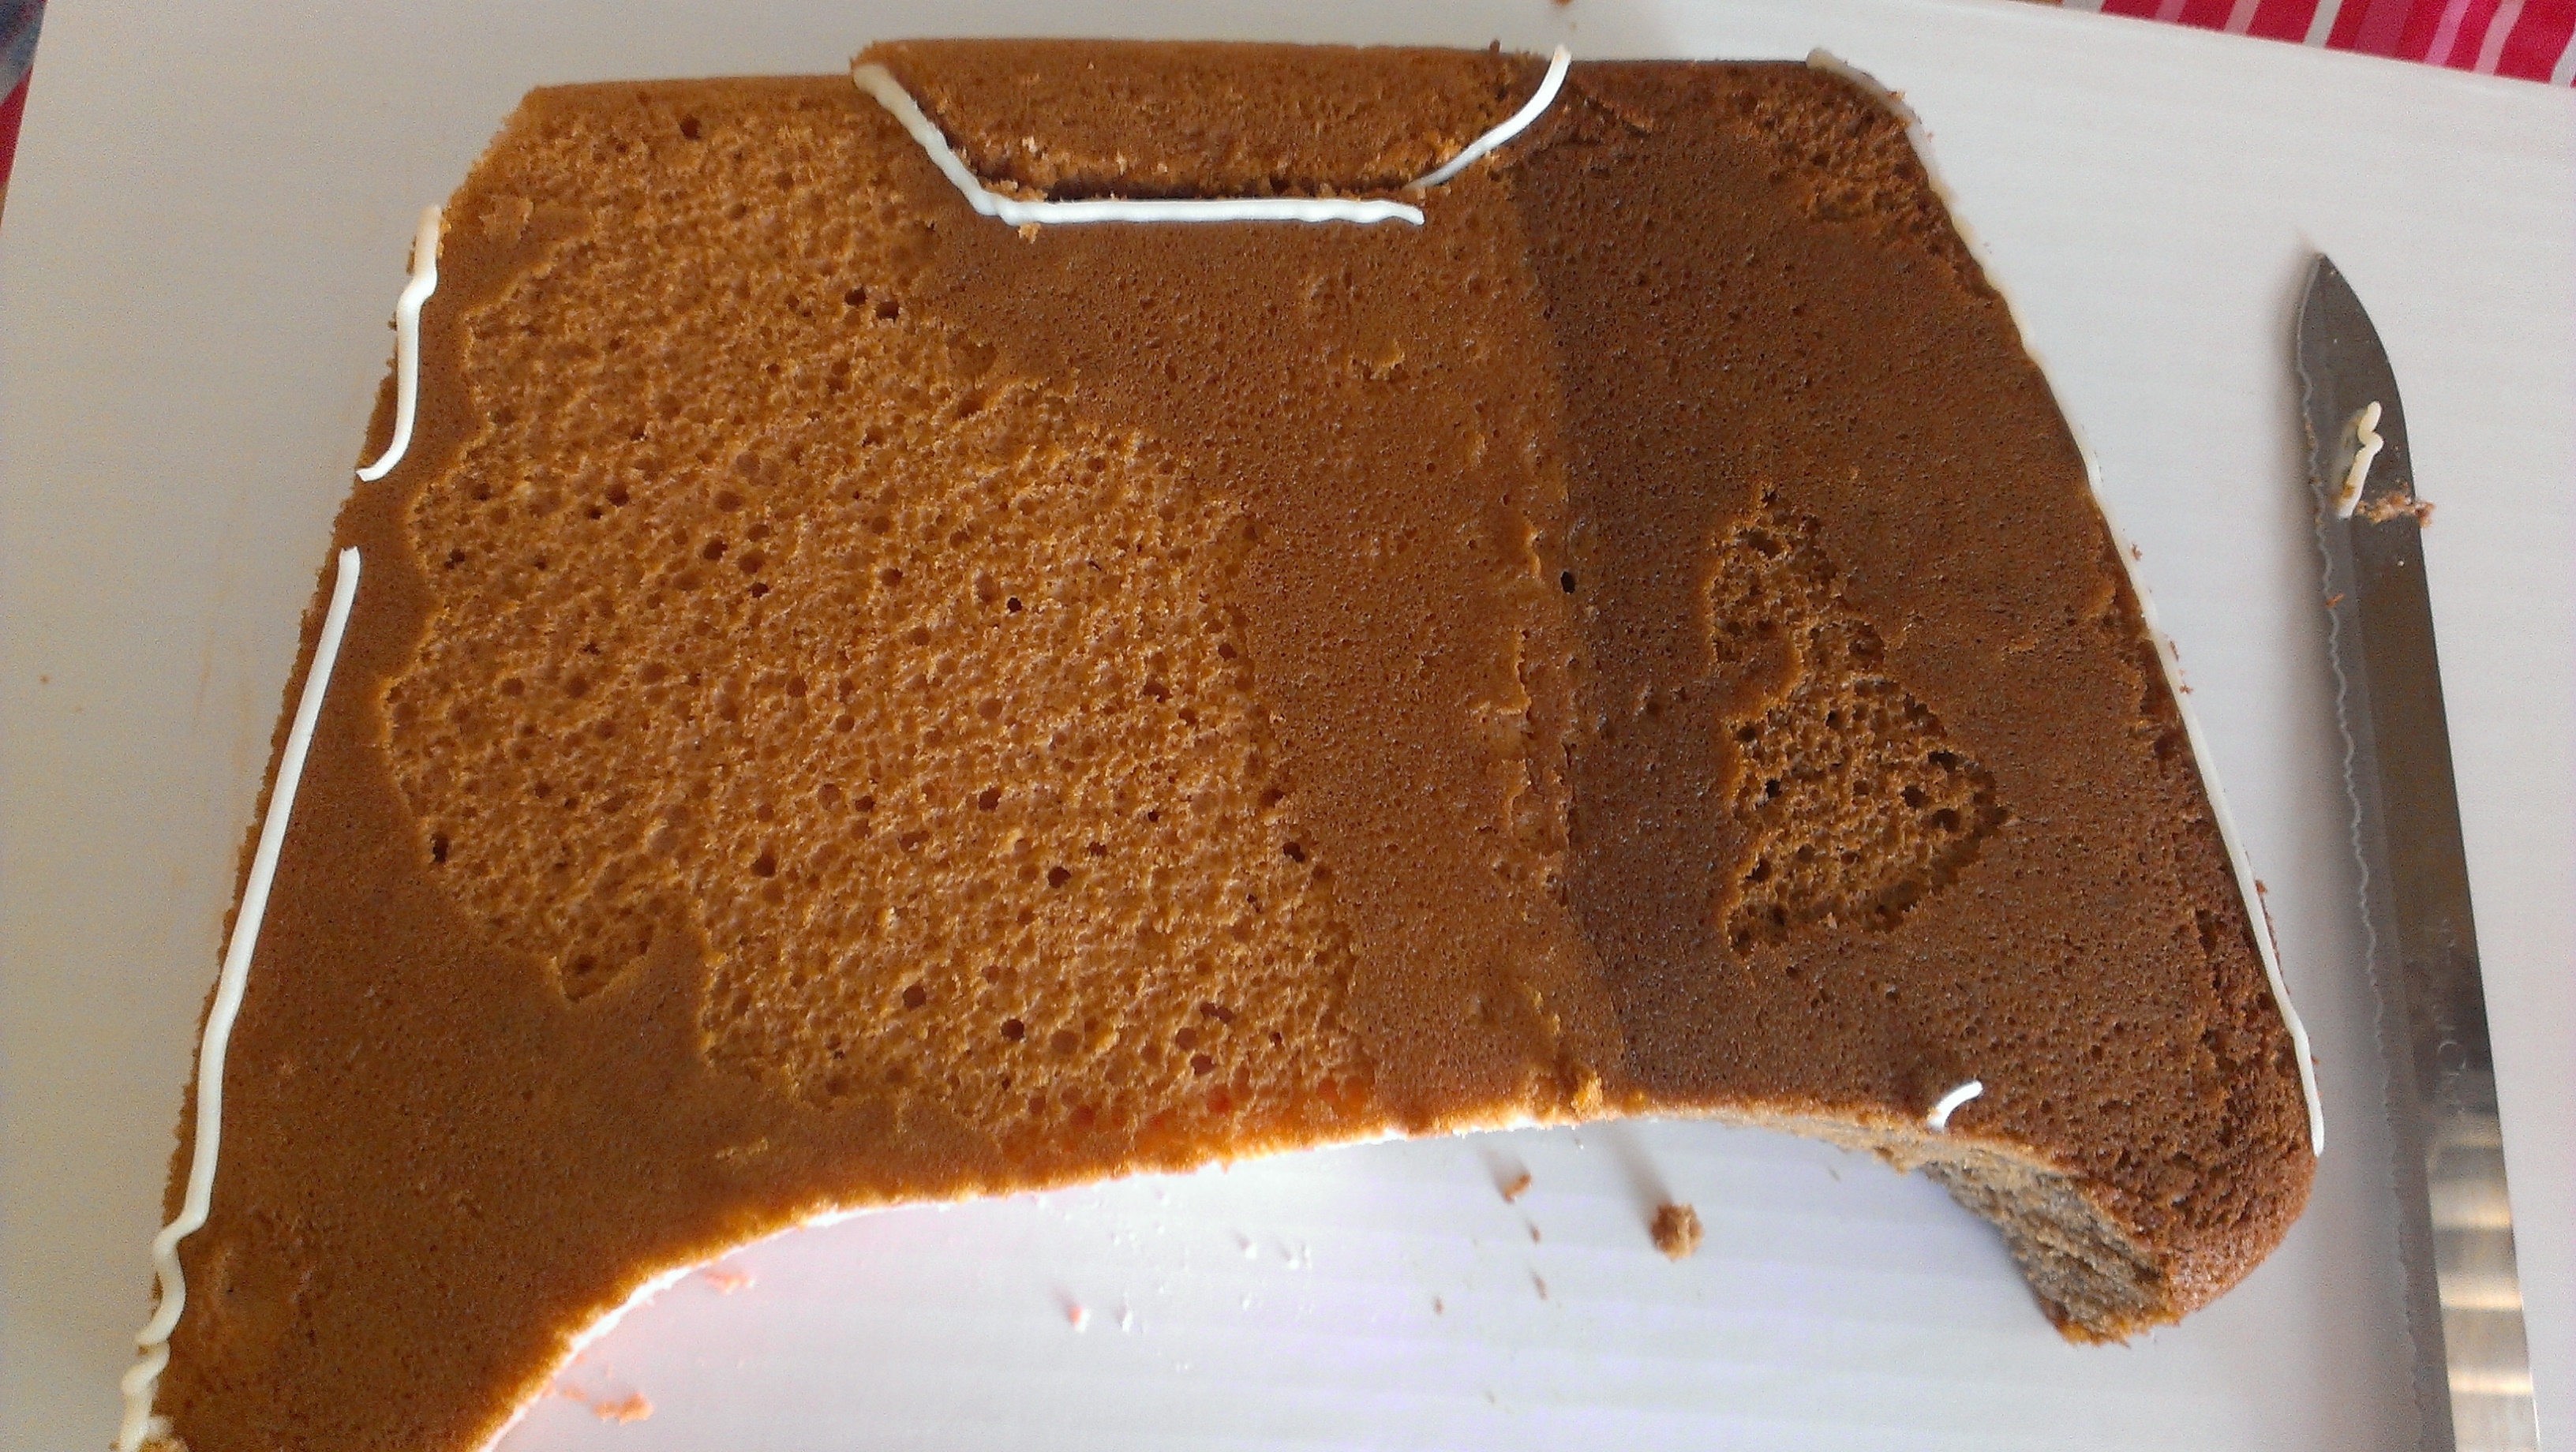
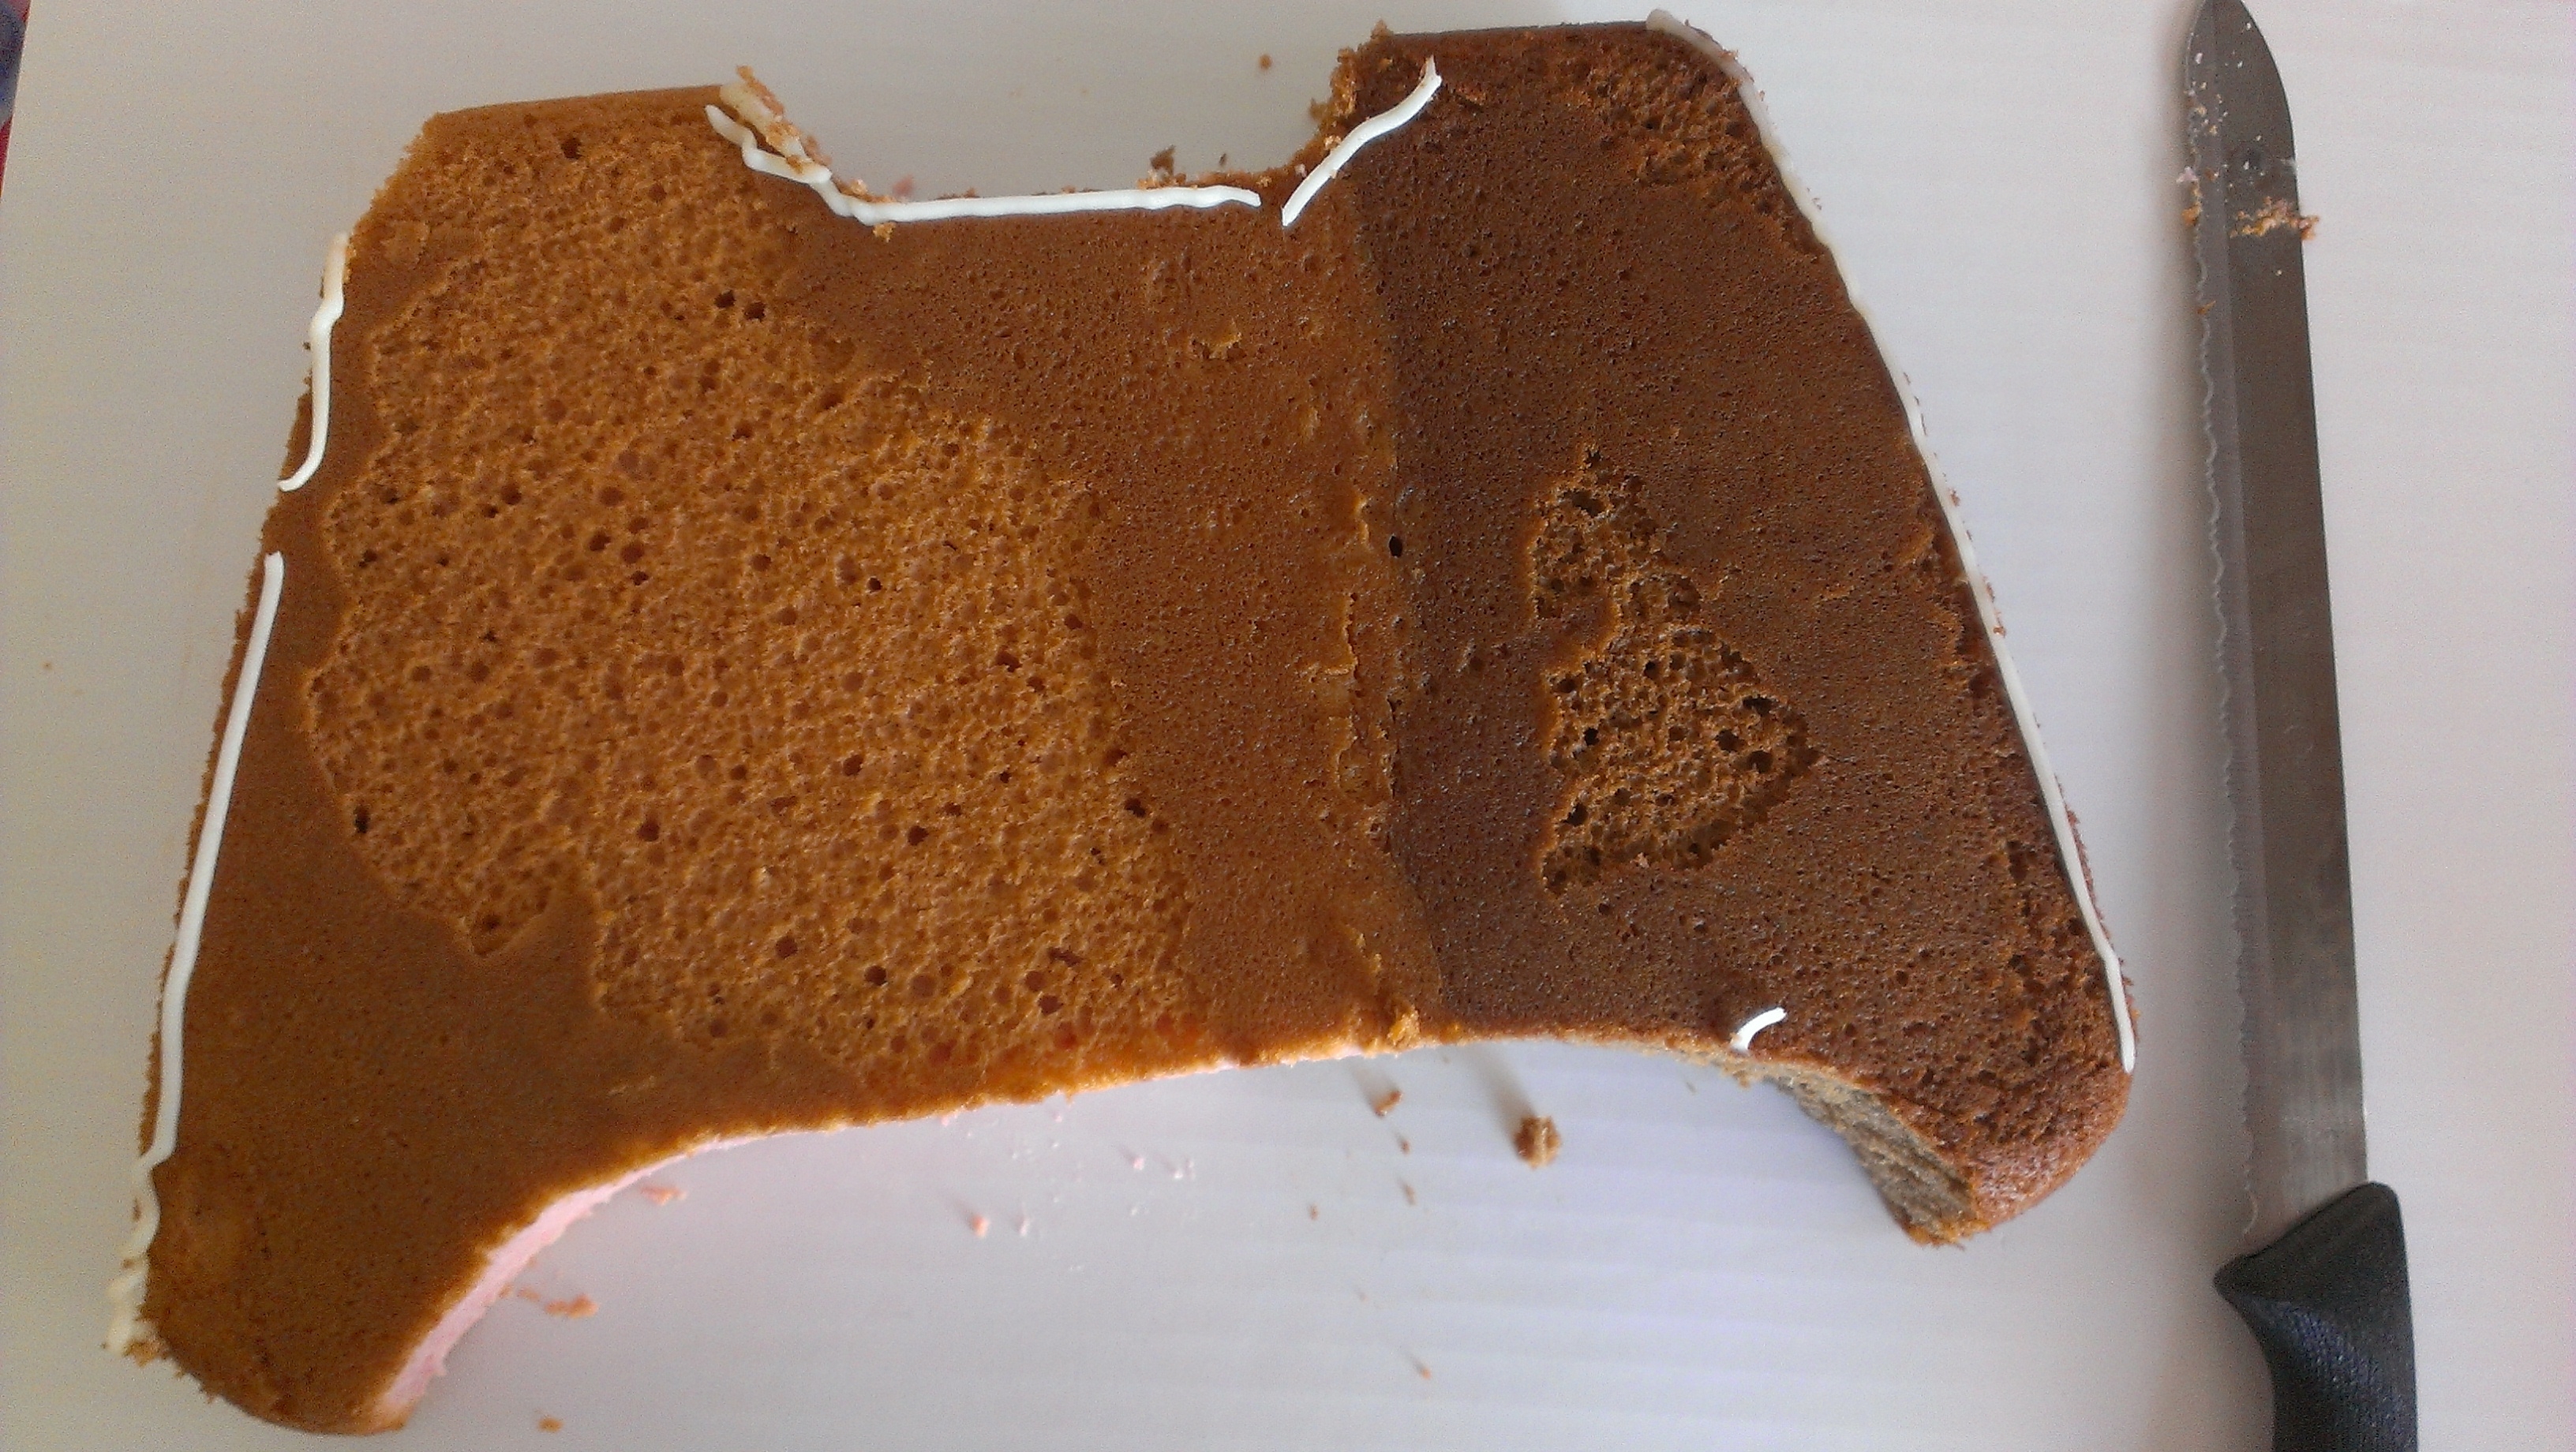
So, turn out your cake and draw with a #3 or #4 tip the general shape of your cake. Below is a picture of the cake after I had drawn it and started to cut. Use a serrated knife and it will easily glide through your cake with minimal “crumbage” (that is the technical term)
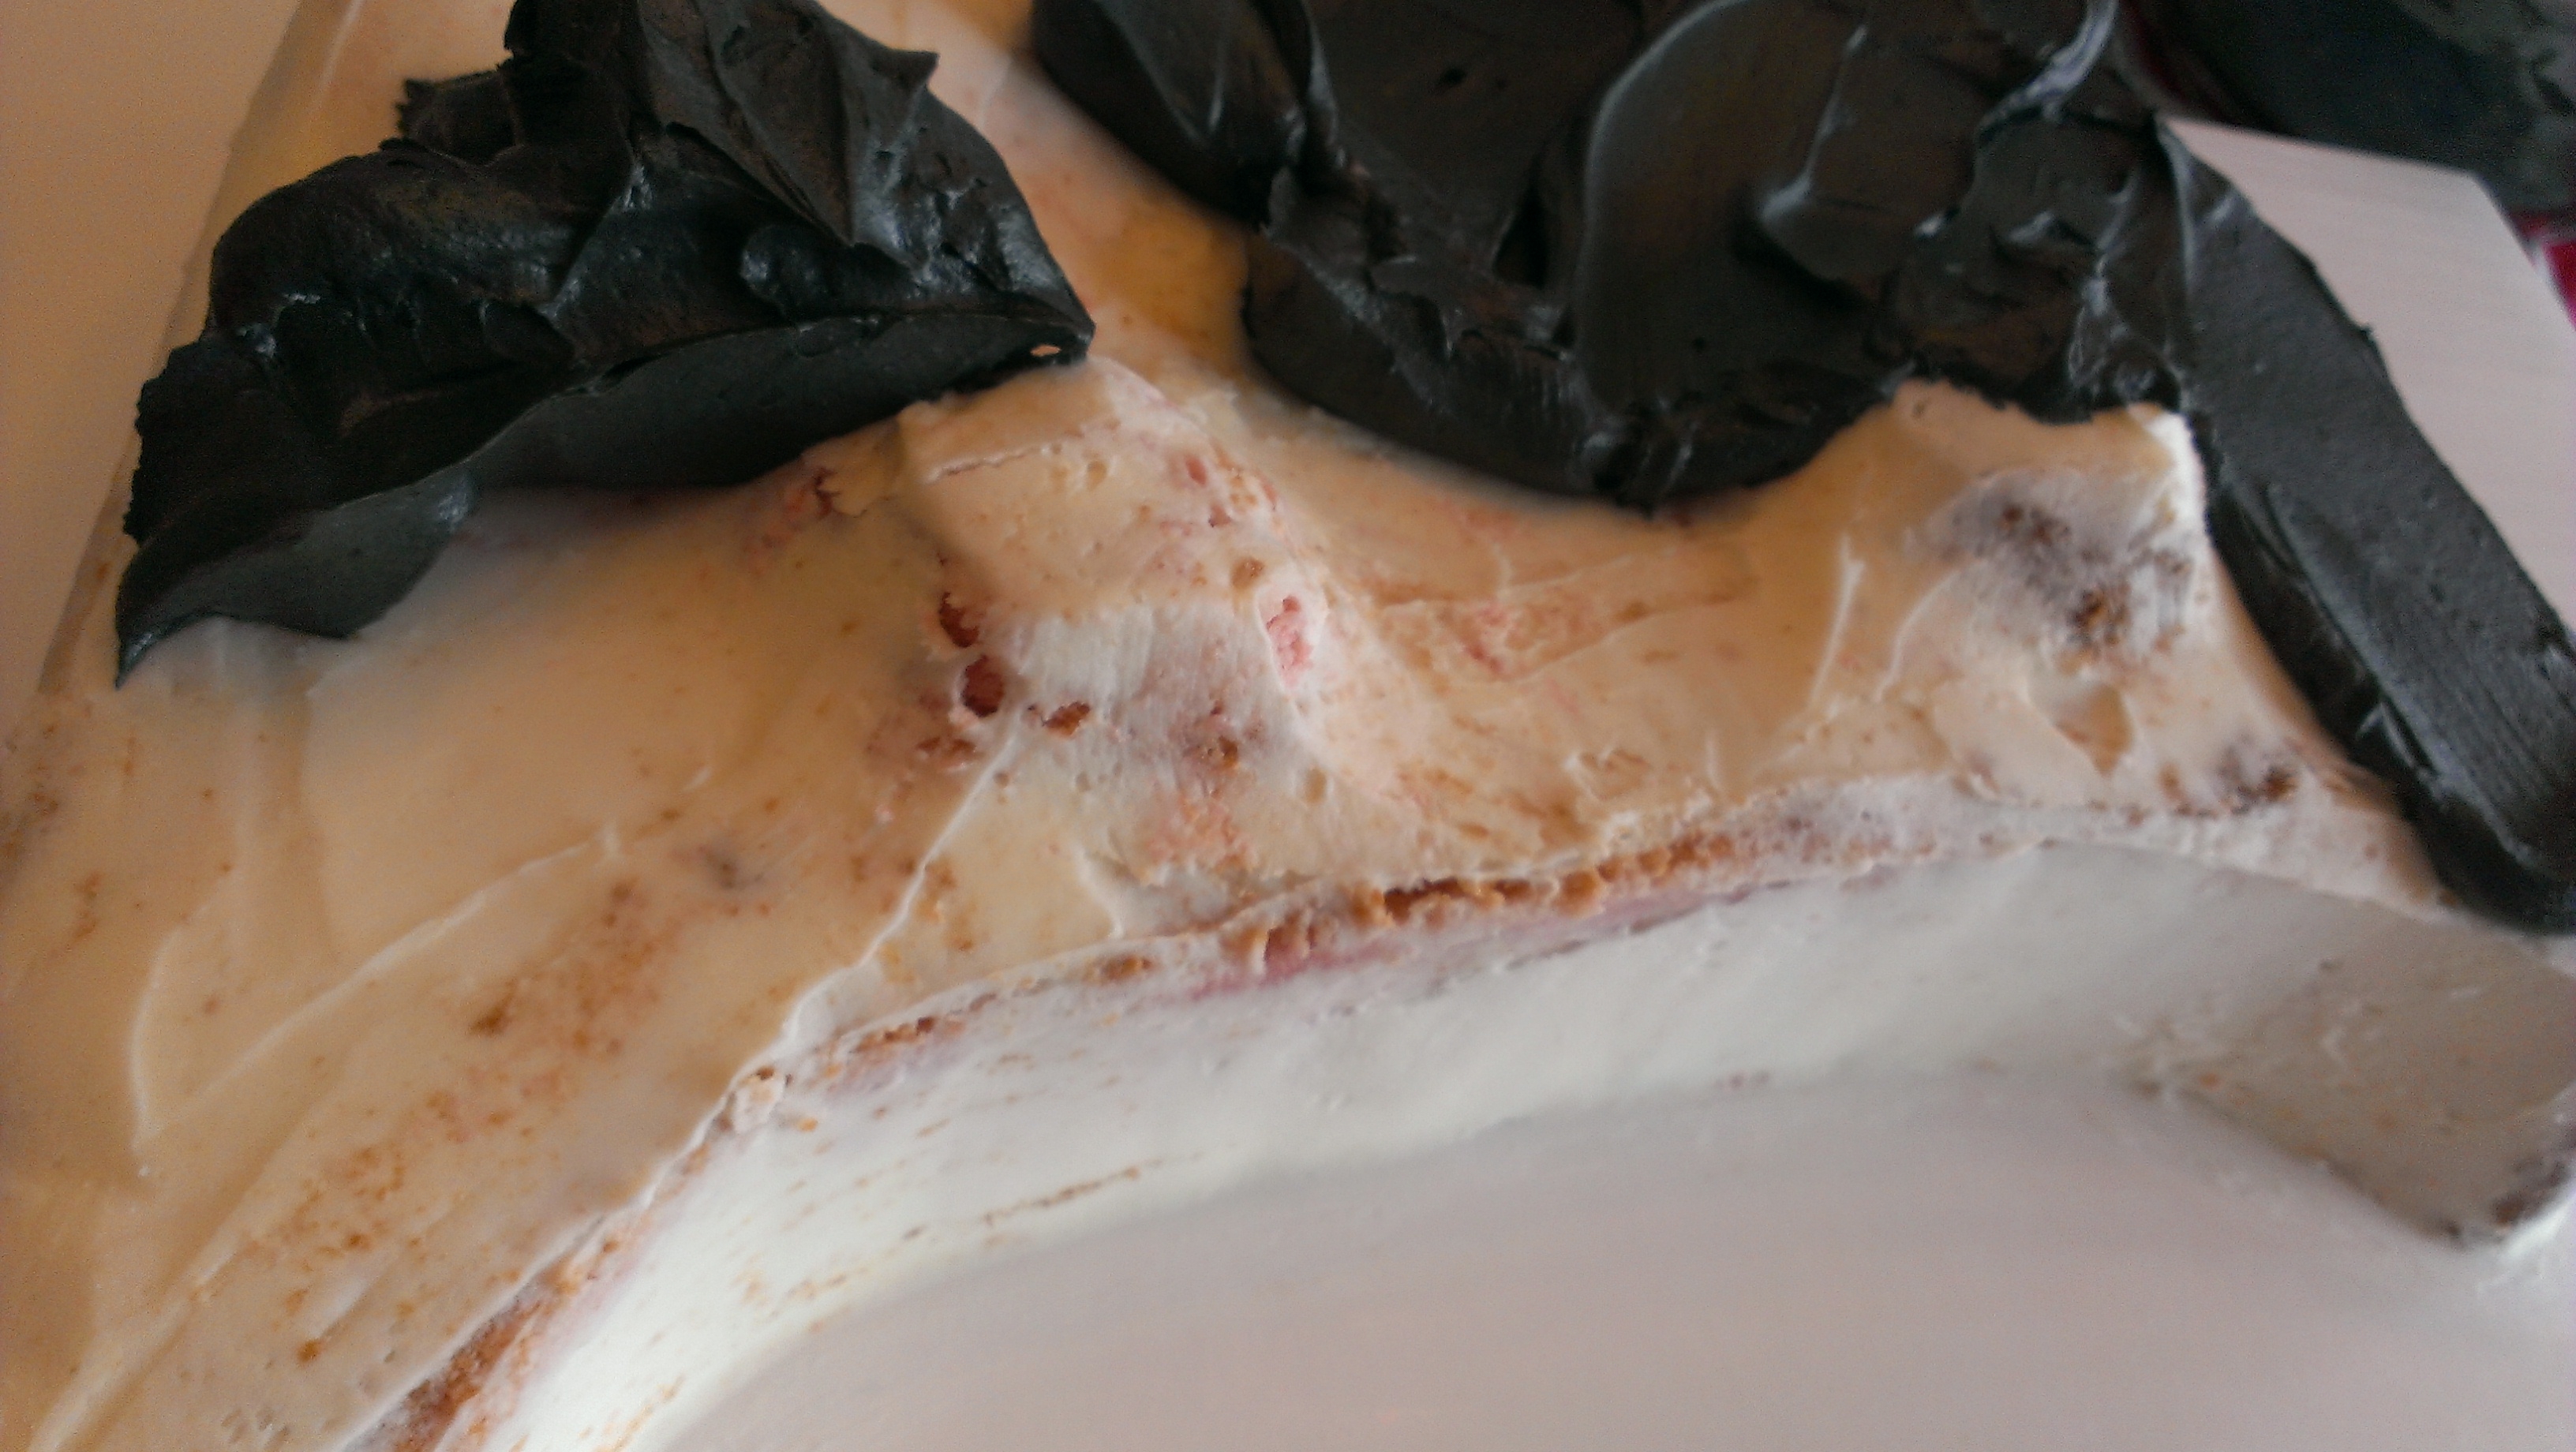
After cutting it into the general shape, then you can dirty ice it. This is also referred to as a crumb coat. After the initial crumb coat, you can build up the shape with the pieces you cut away.
In the above picture, I have built up the back corners and iced it. Then, I added little pieces to build up where the “joysticks” are. I am a child of the 80’s, and back then the lever you moved around on an Atari was called a joystick so it applies here too. Welcome to my limited knowledge of video games. Each time you add another dimension of cake, dirty ice and smooth it again. You may want to put it in your fridge in between steps until you get more comfortable with smoothing out your add ons.
When it’s completely crumb coated, put it in your freezer. That will make your icing get hard enough that when you add your color, the crumb coat won’t smear into it.
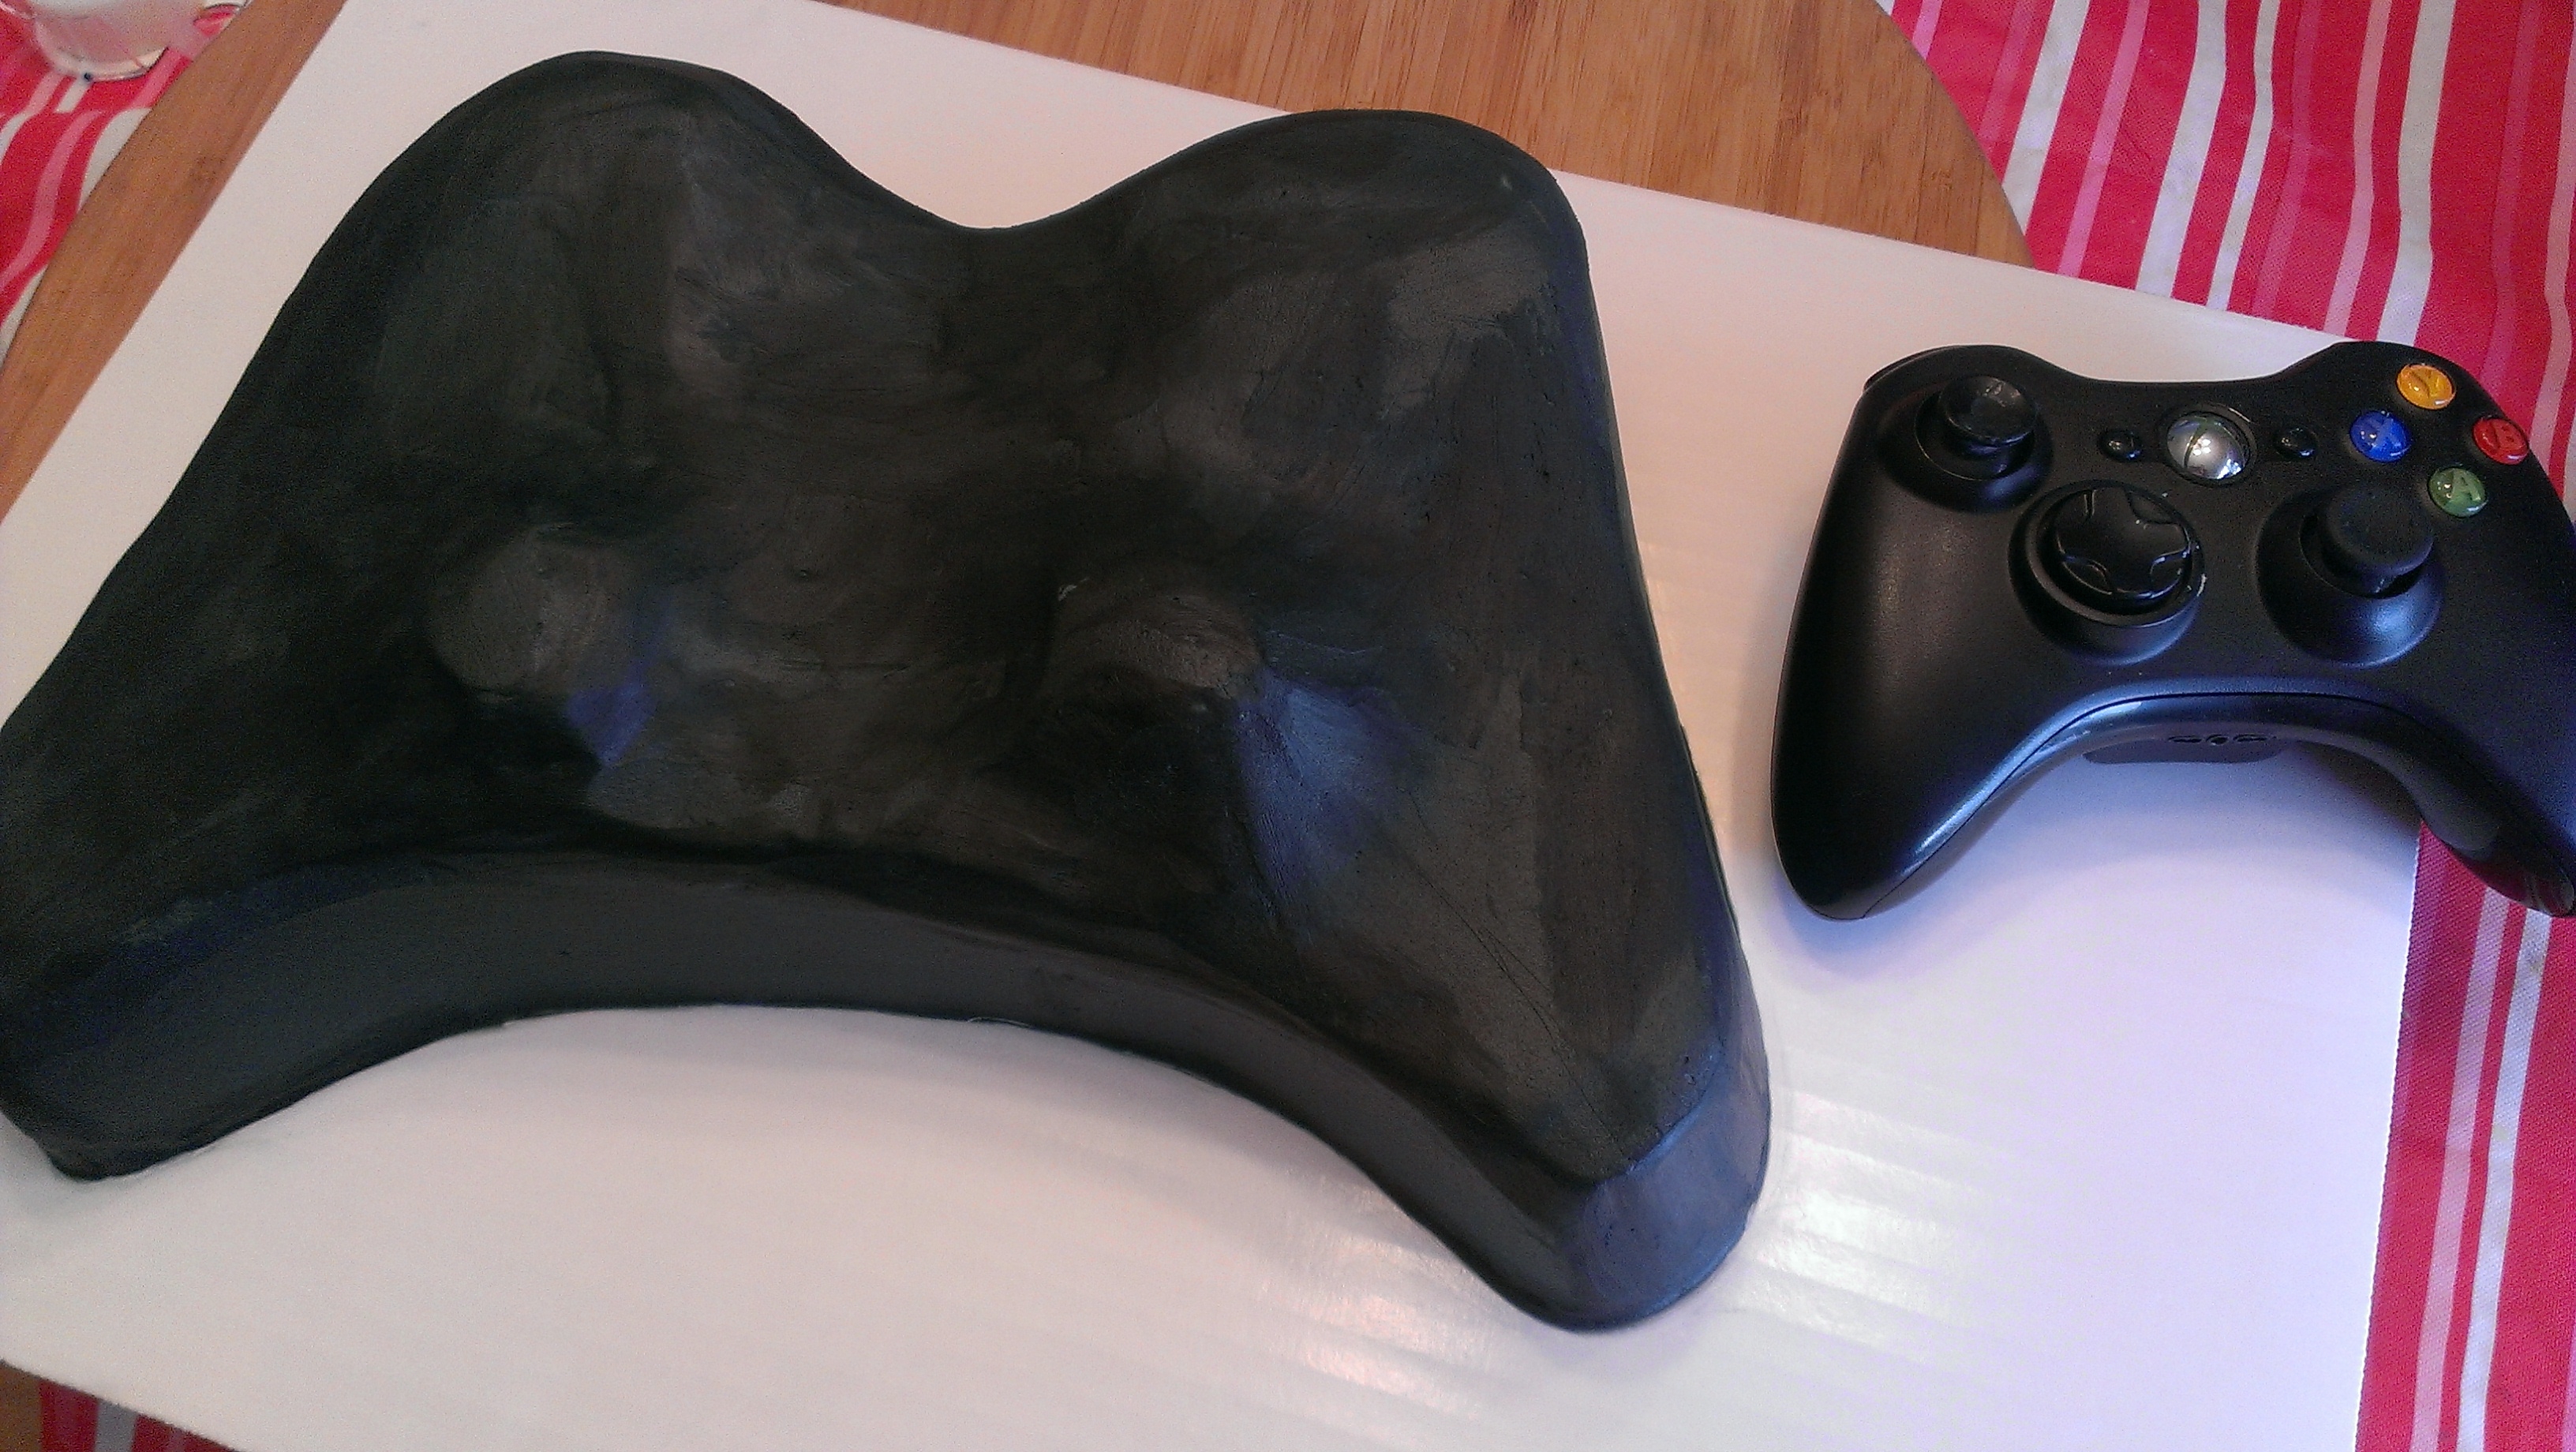
Now you can add your base color! In this case it was black. And yes, the kids’ mouths looked hilarious. Smooth this out all over your cake. Then, use a flexible scraper or I even use old credit cards to smooth it down.
There it is! You did it! (Insert your name here) made a sculpted cake! All that’s left is the details. For this one, is was mostly fondant pieces and a little piping.
If you like cake decorating, you can do this. It will take practice and patience, but you will get there. In the long run, you will save money by not buying so many pans! Also, don’t think you have to cover it in fondant! I got mine this smooth with good old fashioned butter cream.
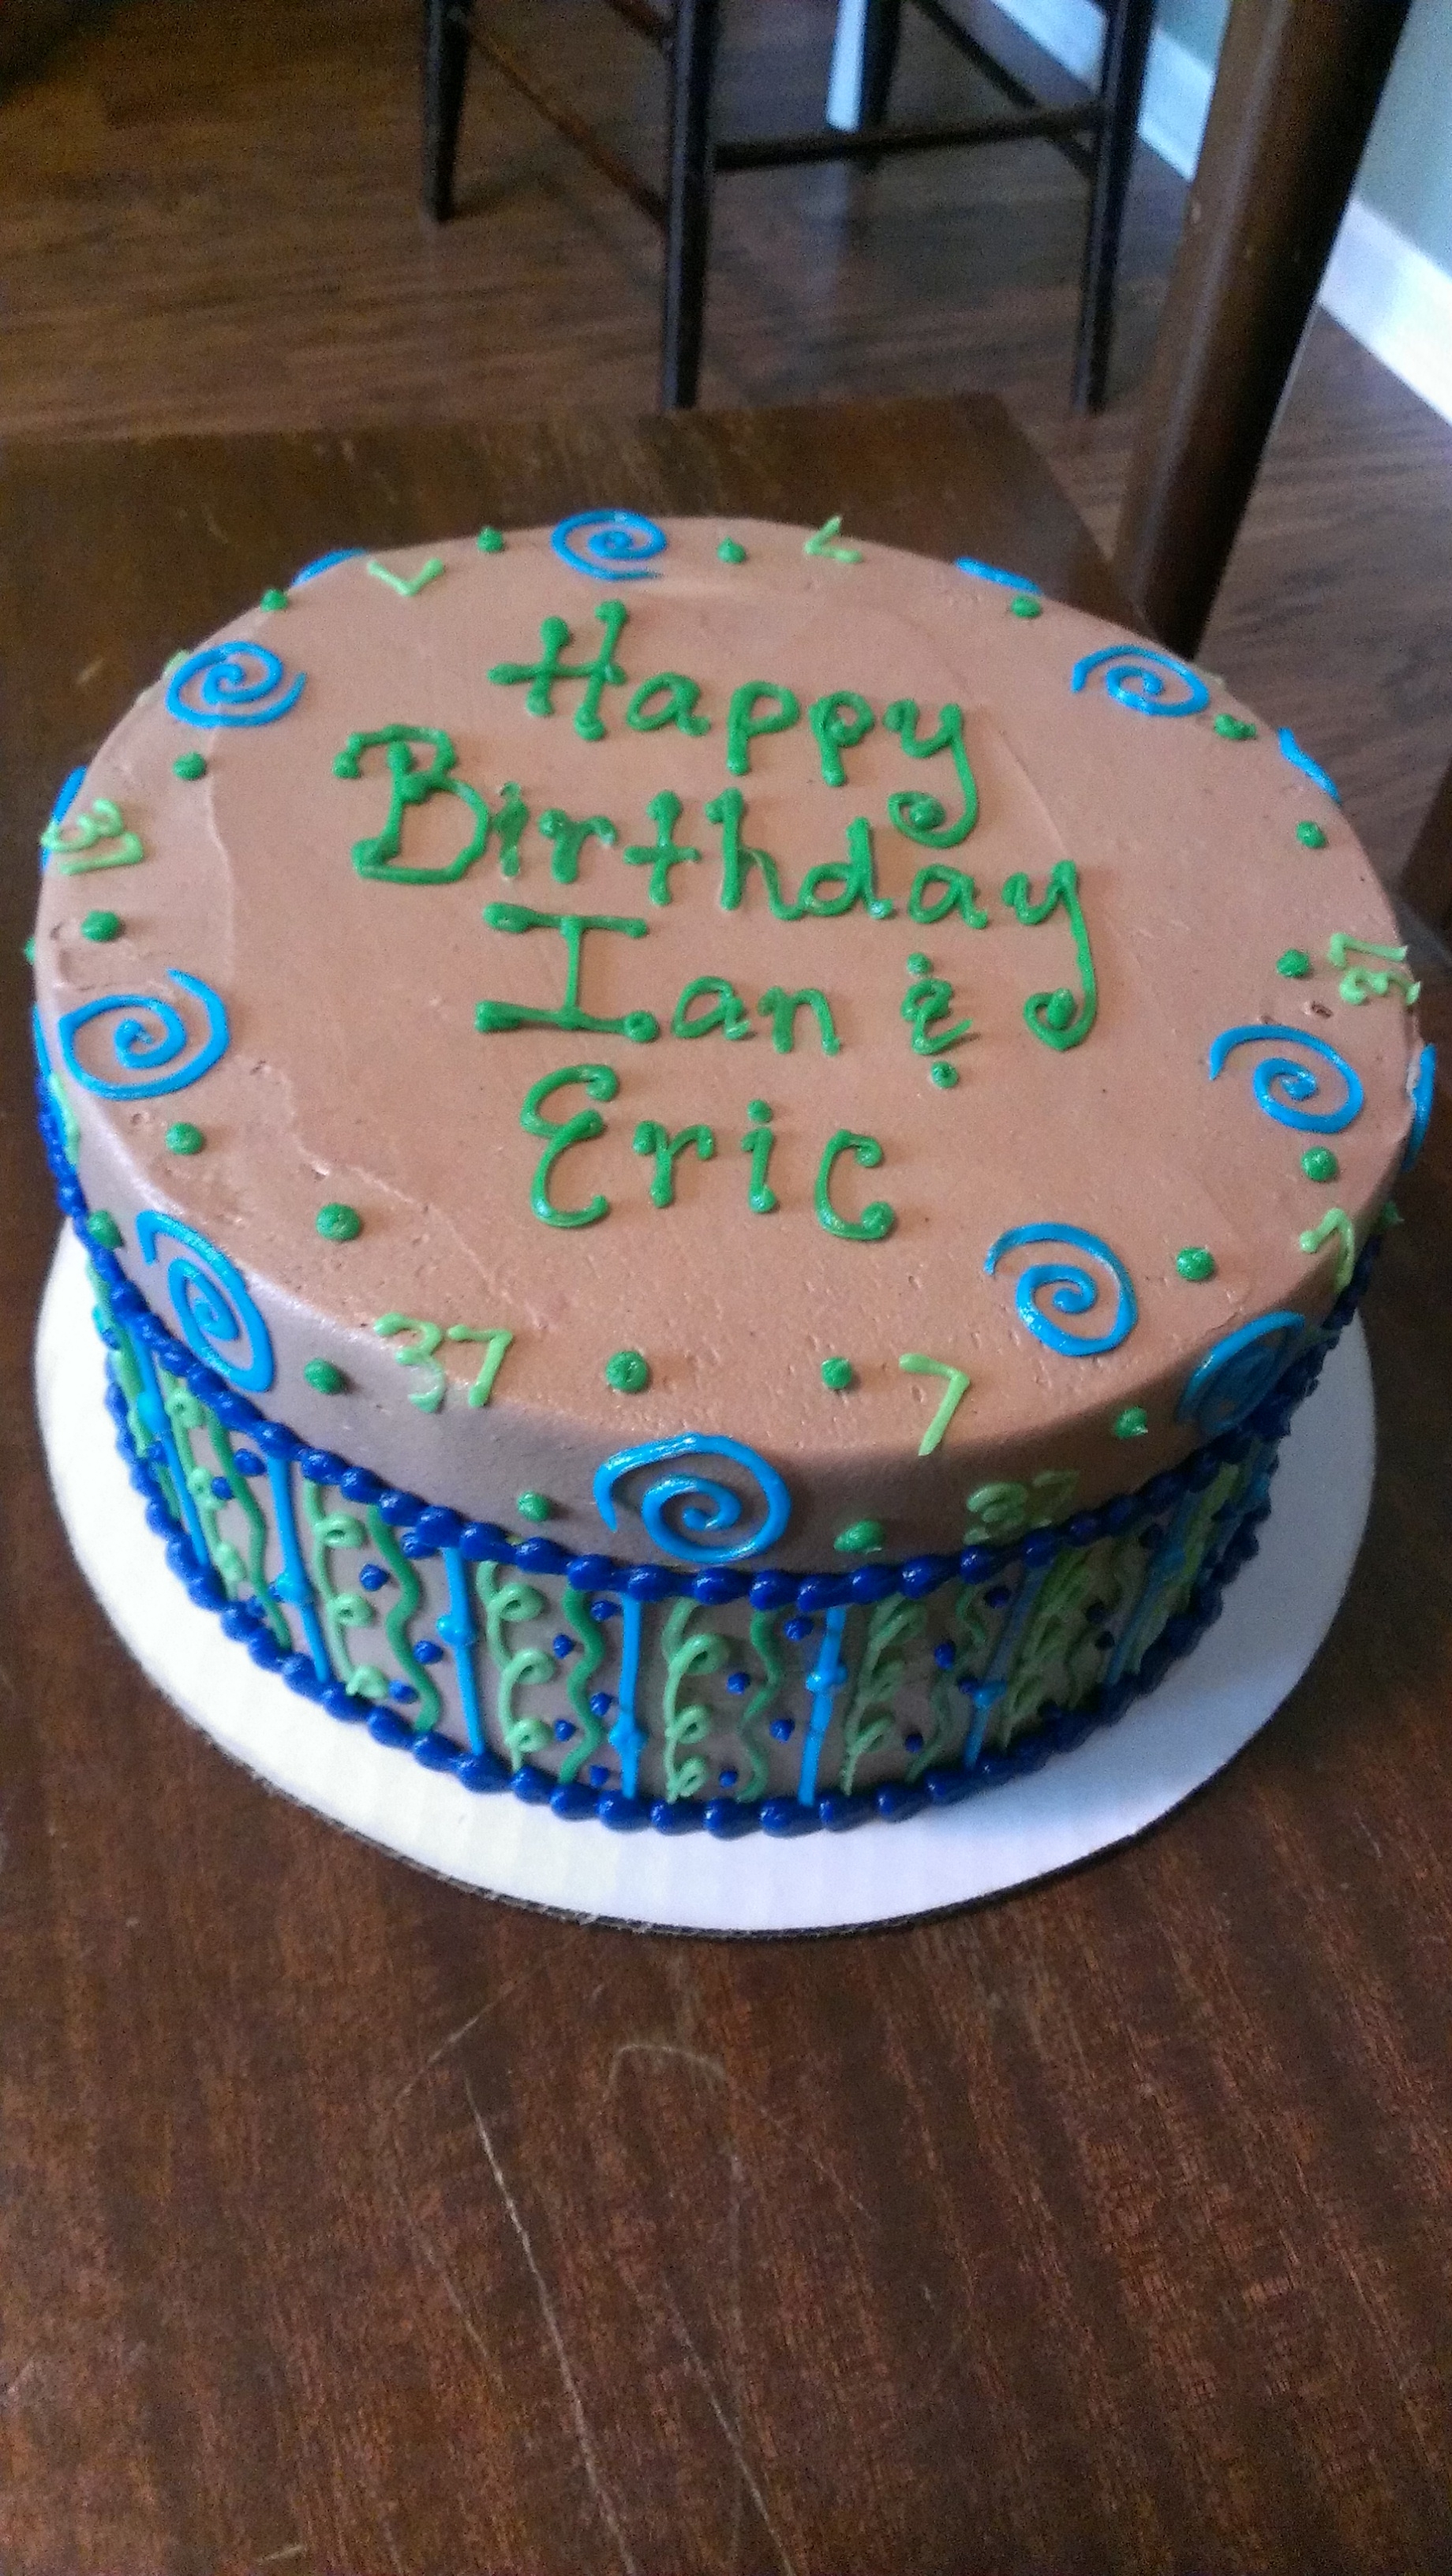
This design is great for guys of any age! This one was for my two guys, my husband and son. They turned 7 and 37. Don’t you just love how the colors pop on chocolate icing?
This cake was for a My Little Pony party. I drew on “cutie marks” all around and topped it with disco glitter. The space on the top was so the mom could add to ponies.
Super Girly!!
This was a replica of a popular sports wear brand. As boys get older, it can be harder to find a theme they get excited about. What a great idea idea to use the logo from his favorite sandals!
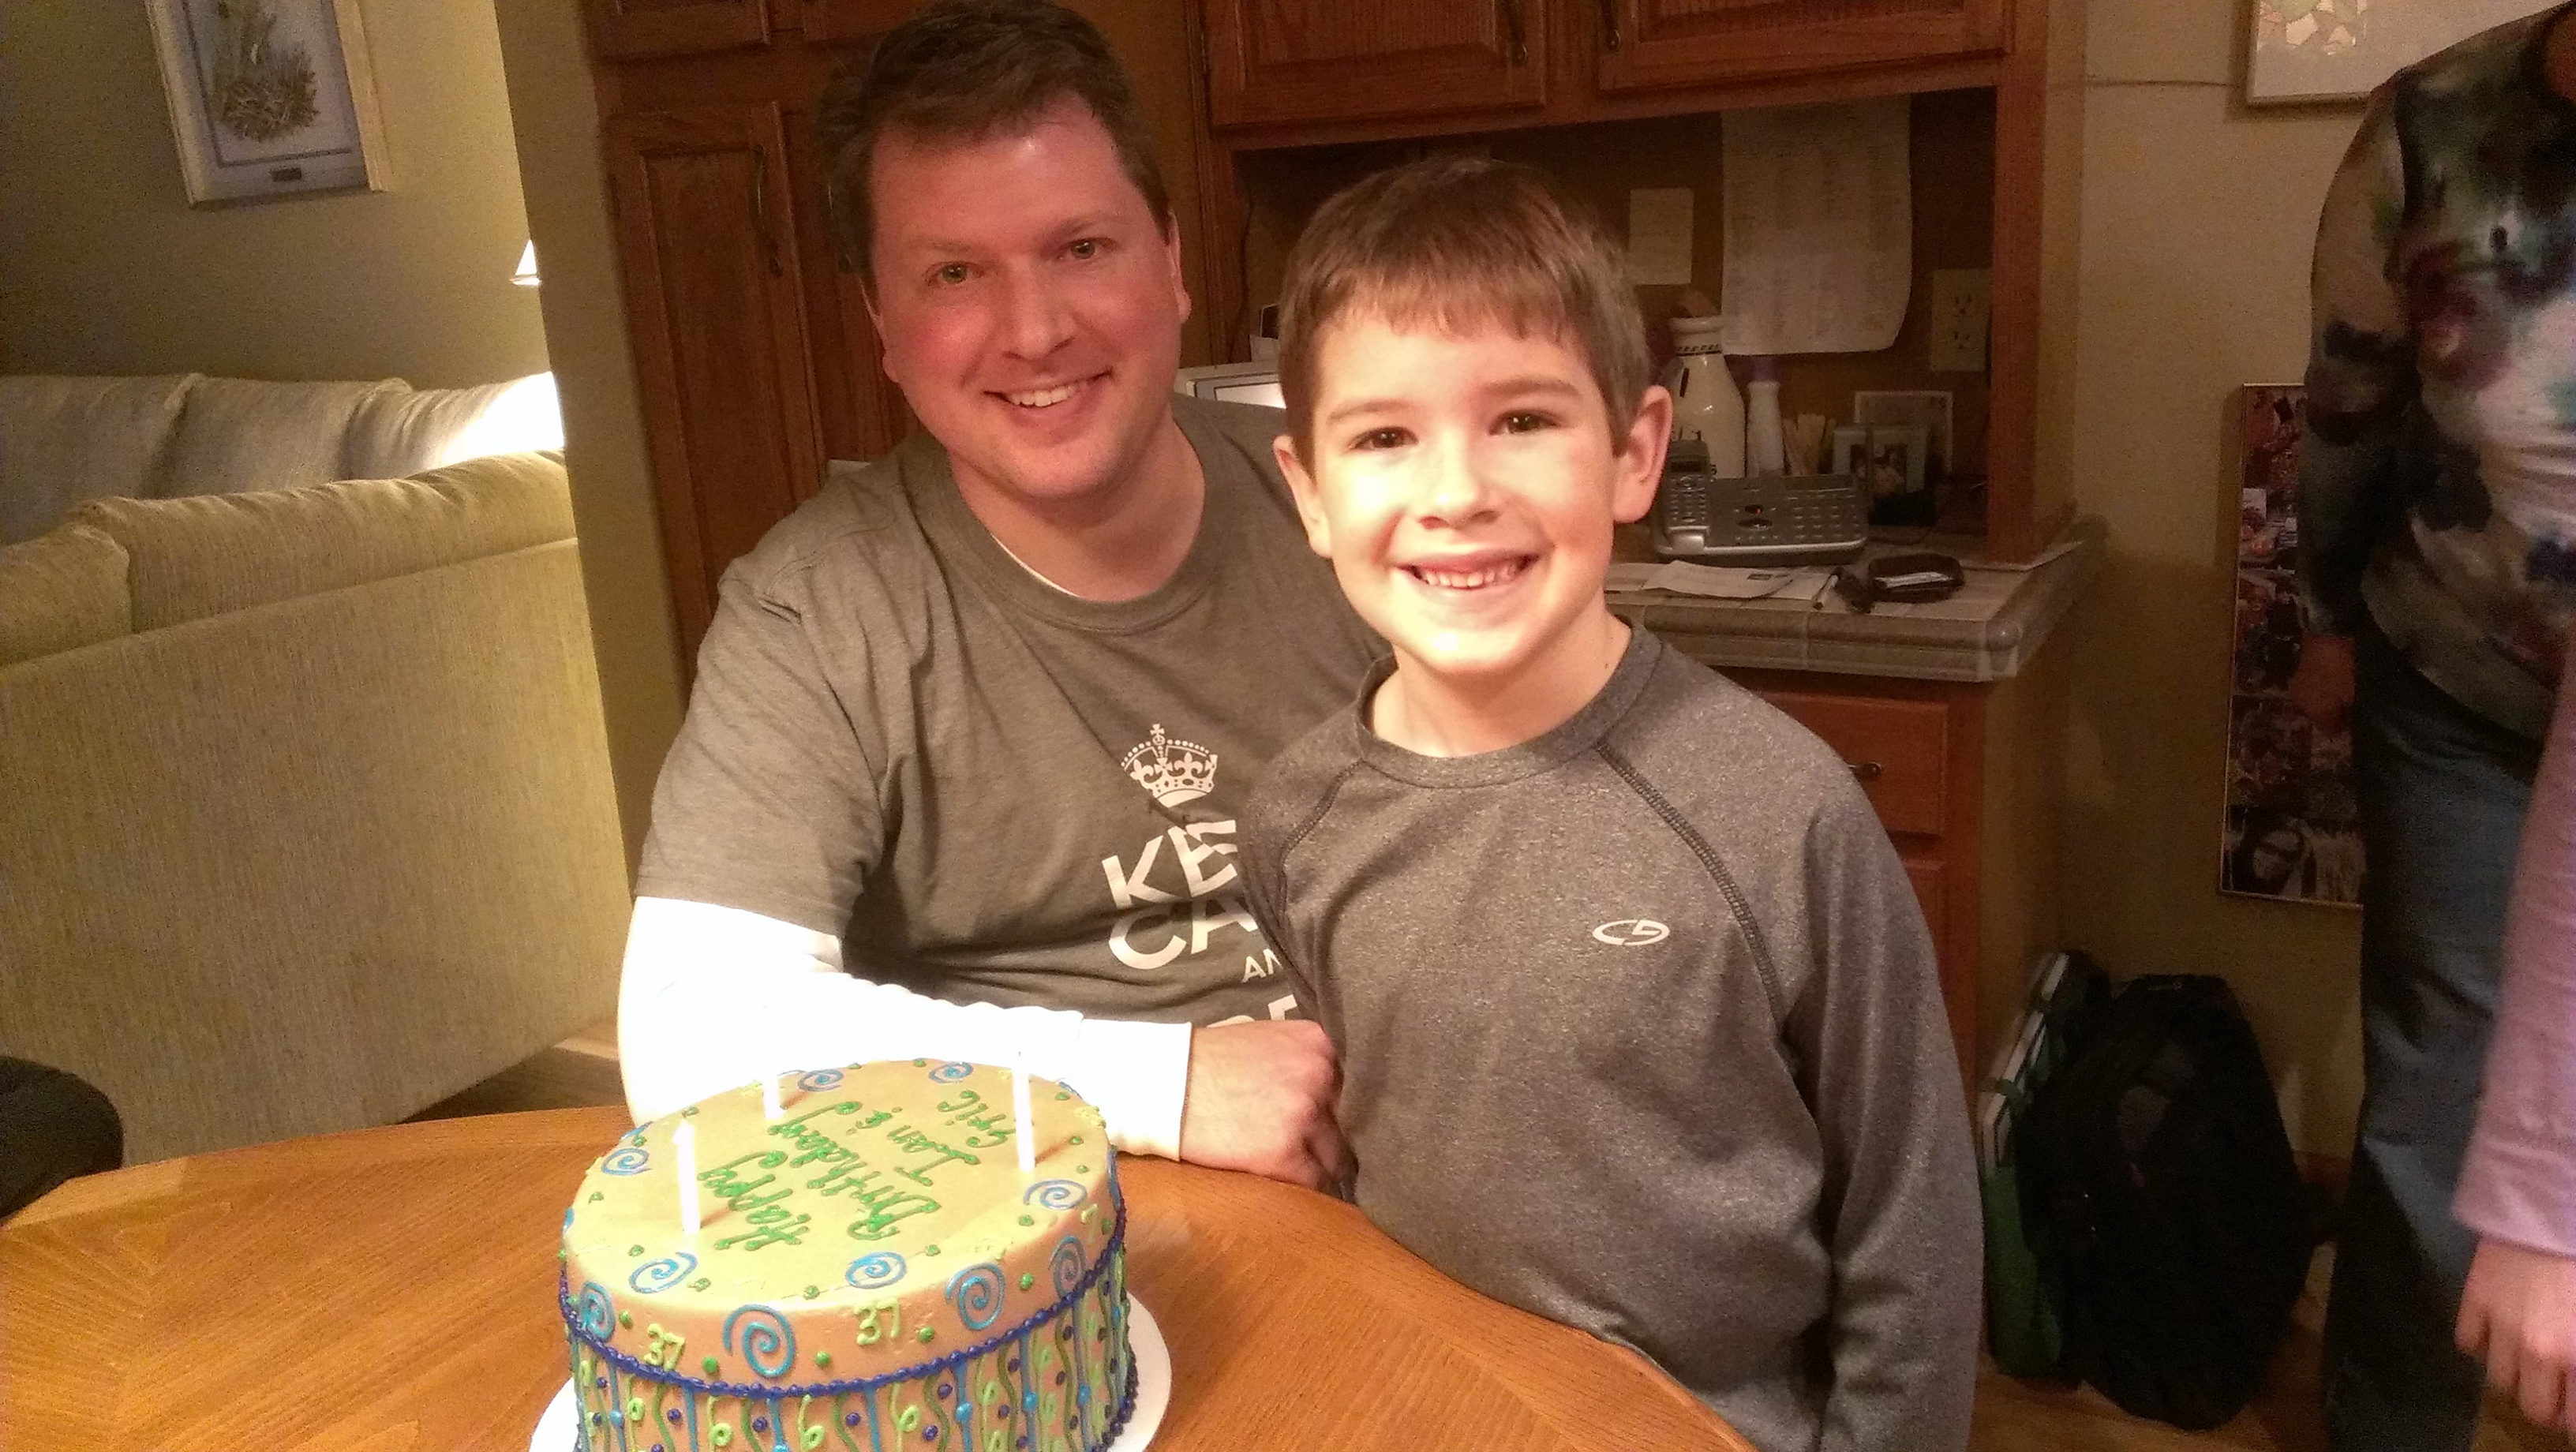
This was a big week at our house! Not only did I have two orders, but it was my husband’s and son’s birthday. My son was born on my husband’s 30th birthday. It has been a really special connection for them and it makes celebrating extra special. While my husband and I work to make our son’s birthday special, our son tries hard to make it special for his dad. He spent the entire week bringing his dad things from his room to make him feel special. I love my guys and I love their birthday bond.
My sister will kill me for making this post, but it has to be done. The most important word in the cake baking world is…wait for it…MOIST. I know, I know. It’s an AWFUL word. I hate it too, but it’s a necessary evil. Nothing is worse than cutting into a beautifully decorated cake, excitedly lifting that first bite to your mouth, and it’s DRY. Crumbly, dry cake. BLECH! Not on my watch, people! Only moist cakes leave my kitchen! And I’m here to tell you what you’ve been doing wrong that drys out your cakes. When you set them out to cool, COVER THEM. Don’t let all of that valuable steam drift out of your freshly baked cakes! When you take them out of the oven, immediately cover your pans in foil and seal the sides well. All of the steam will then settle right back into the cake…where it needs to be. I know, I know. I am putting some pretty mind blowing info out into the blogisphere, but someone’s gotta do it!
This cake sure is popular for 1st birthdays! It’s my second time doing it in less than a month! And why wouldn’t it be the perfect 1st birthday cake? At that age, they haven’t always gotten into a character, but what toddler doesn’t love their Cheerios?
I have seen a lot of one year olds that don’t want anything to do with their 1st birthday cake. But put this in front of them, and they will at least pick the Cheerios off!
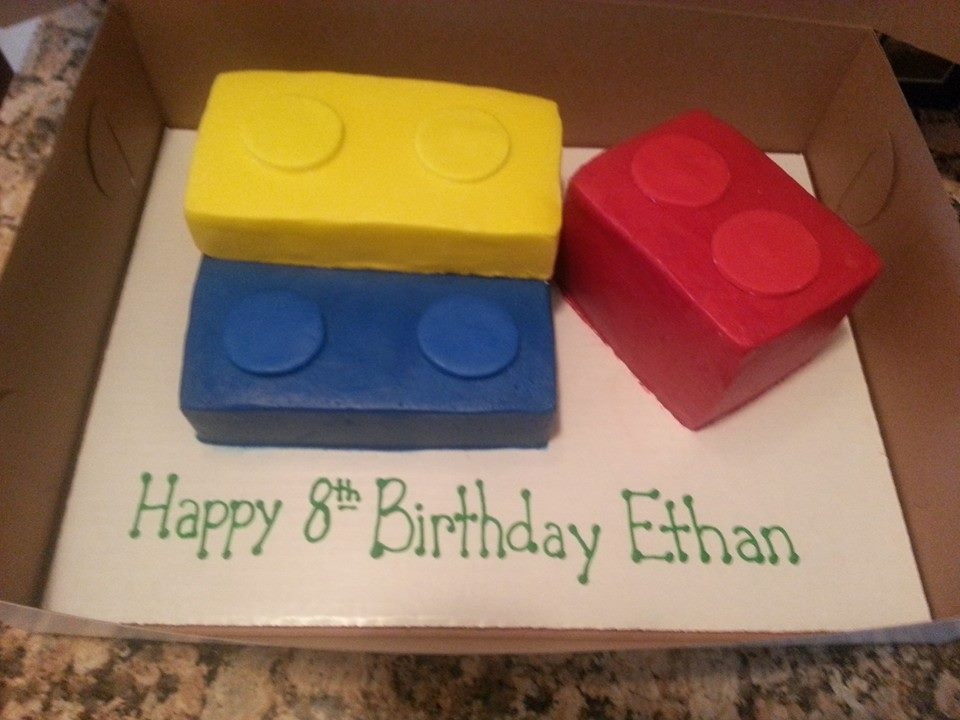
This was for a movie party. Guess what movie they were seeing…
If you haven’t seen the Lego movie, go NOW. It is absolutely wonderful. Regardless of your age, it is laugh out loud hilarious.